Plan with AI
Get a plan review
Get your PRD and Features reviewed through six lenses, from Development to Security, and work through each finding.
Plan review has the AI read your PRD and Features through six lenses (Development, Business, UX, Design, QA, and Security) and flag missing conditions and risks as findings. Run it before handing work to developers, or after a big round of edits.
Start a review
- Open the PRD or Features tab in your project.
- Select Review in the left rail. The Plan review panel opens next to the rail.
- On the "Review your plan?" screen, select Start review.
- You'll see "Reviewing from multiple perspectives..." and results fill in as each lens finishes.
The chat starter button Review all documents opens the same screen. If you close the panel while a review is running, it keeps going, and you'll get "Review complete. Click the icon to see results." when it's done.
When the document is large
If your plan has a lot of items, you'll first see "This document is large, so we'll review it in parts."
- Pick the groups of items you want reviewed.
- Select Start review.
When reviewed in parts, each group is reviewed on its own, without the context of the whole document.
Read the results
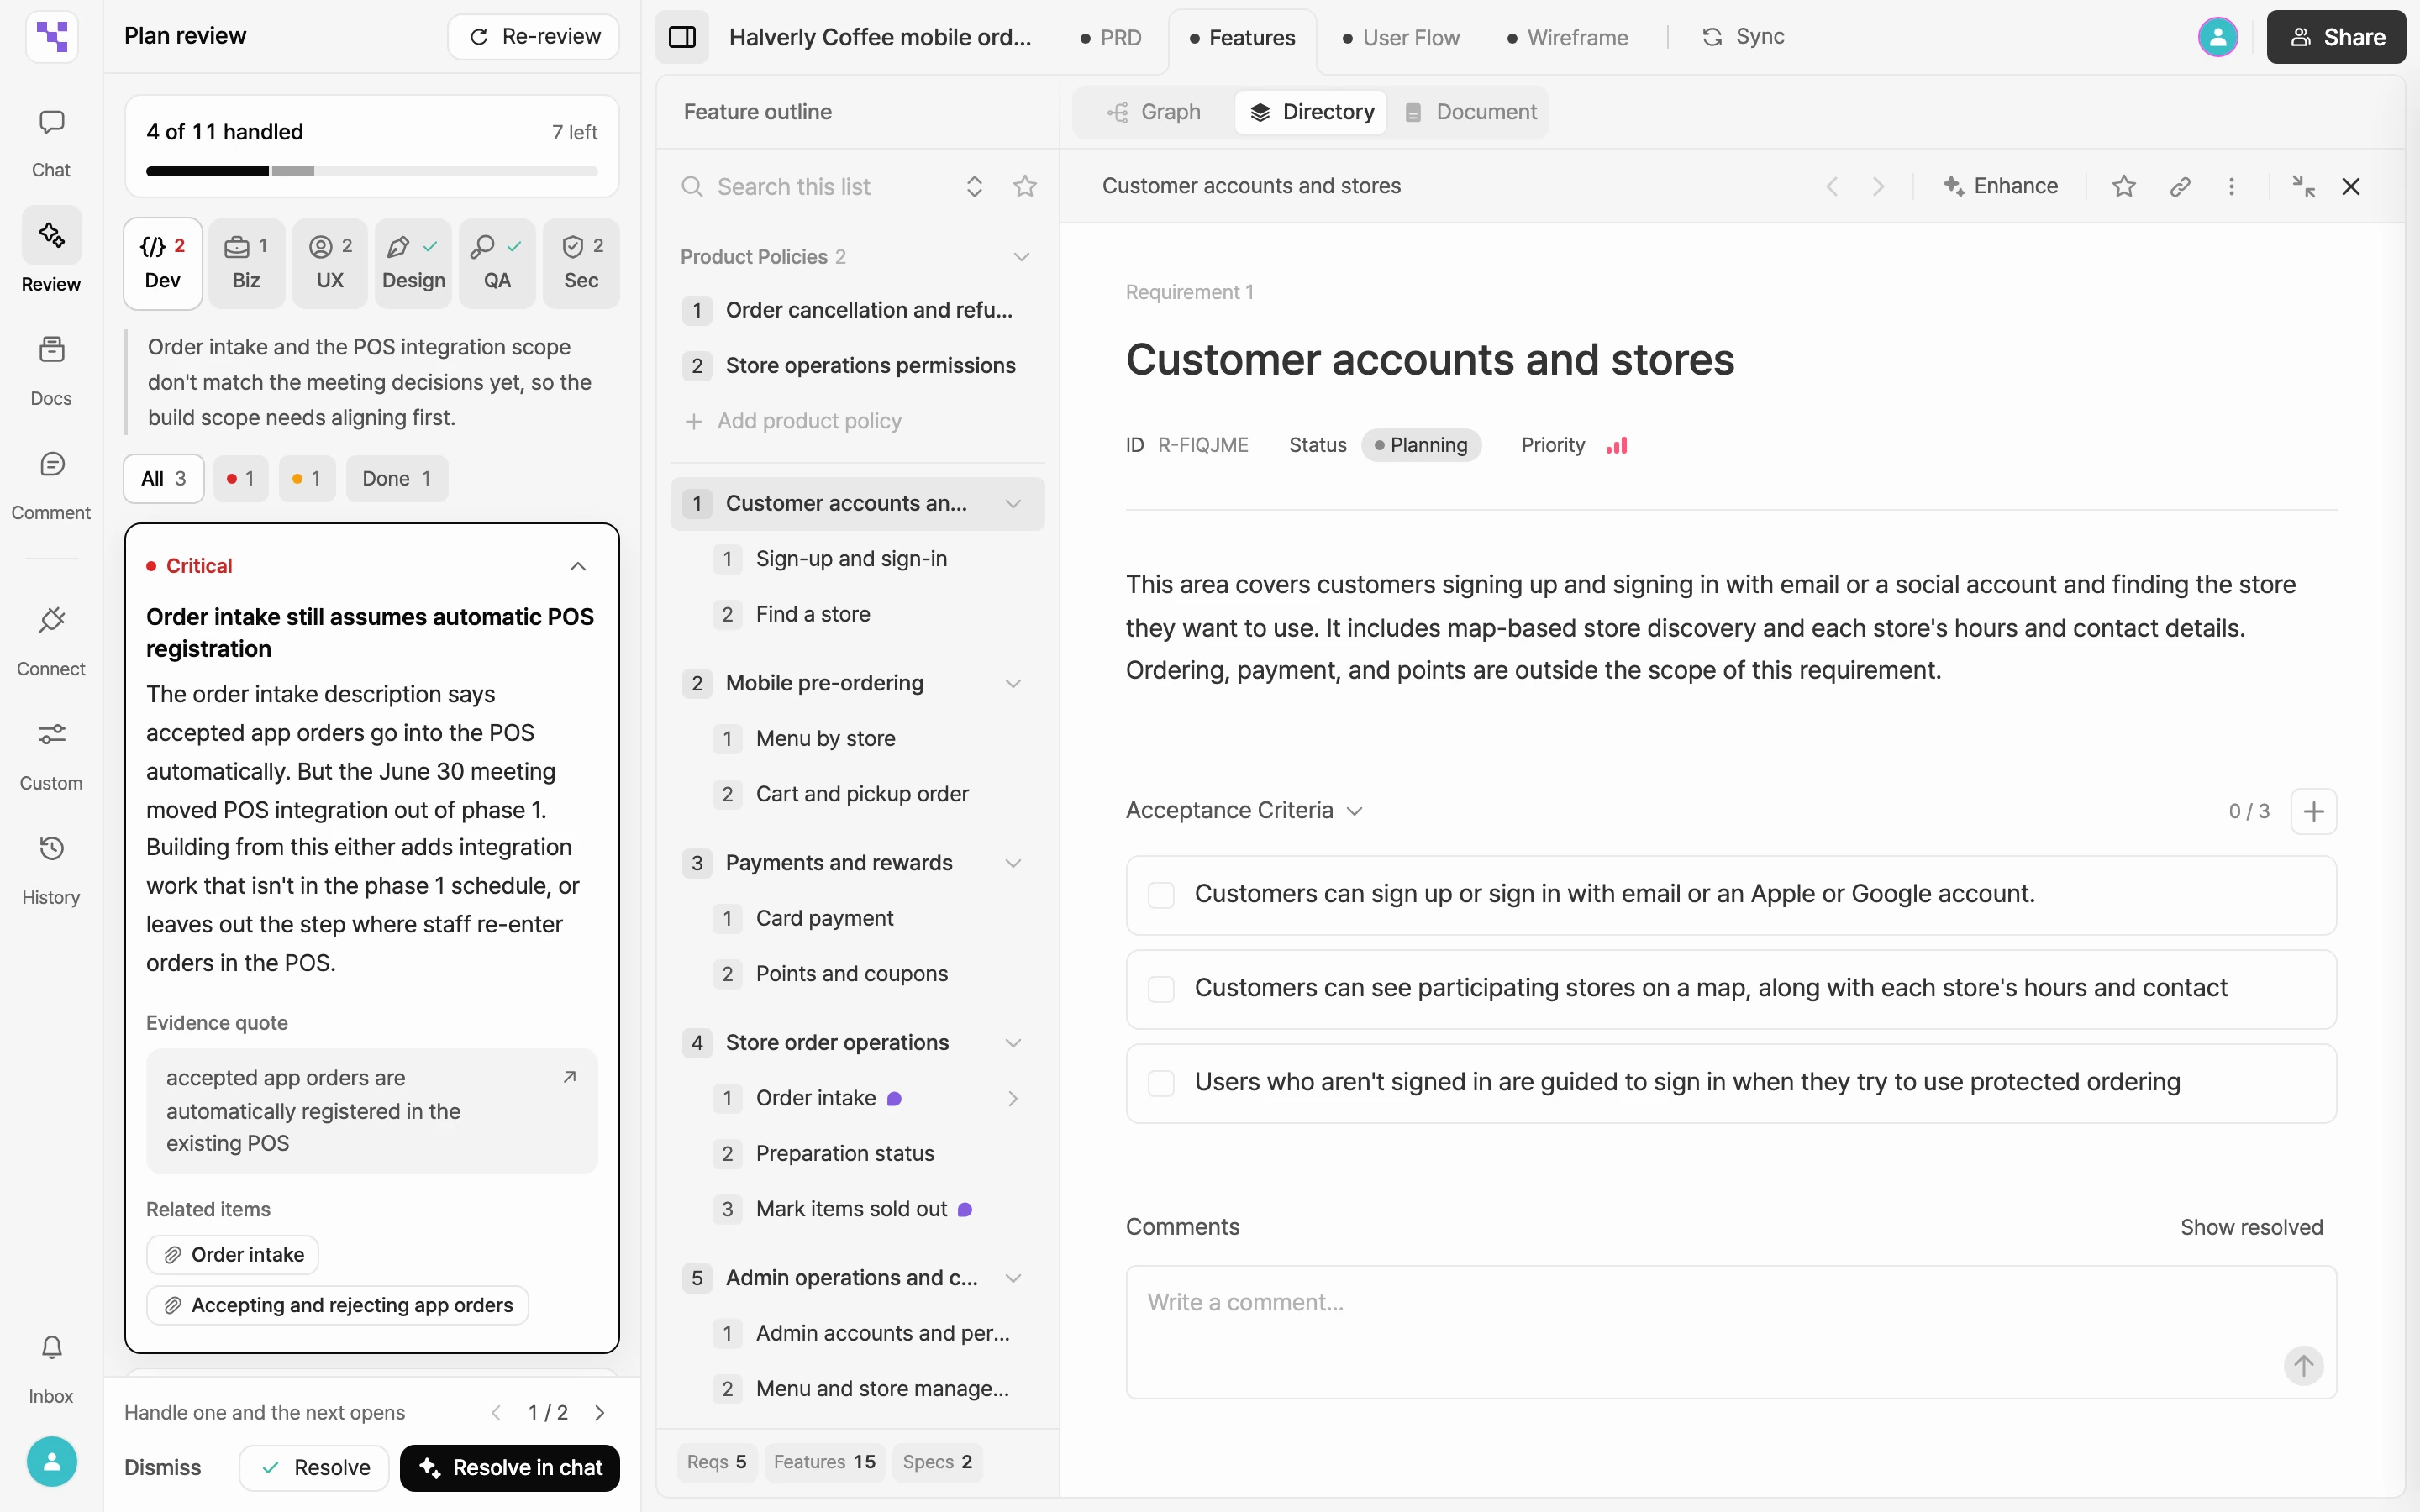
- Lens tiles: tiles for Development, Business, UX, Design, QA, and Security sit at the top. Each shows a status such as N left, All handled, or No findings. Select a tile to see that lens's findings. The lens with the most severe finding opens first.
- Progress card: shows "N of M handled" and how many are left.
- Filter findings: narrow the list with All, Critical, Important, Suggestion, or Done.
- Finding row: shows a severity dot, the title, and the first line of the body. Select it to expand the full explanation with Evidence quote and Related items.
There are three severity levels.
| Severity | Meaning |
|---|---|
| Critical | Left as is, the plan can't reach its stated goal for its stated audience and scope |
| Important | The goal is still reached, but quality suffers noticeably |
| Suggestion | An improvement that would make the plan better |
In an expanded finding, select the body or the Evidence quote box to jump to the source item with the quoted sentence highlighted. Select a name under Related items to jump to that item. When you're done reading, select the arrow at the top right of the card (Collapse).
Handle findings
When you expand a finding, action buttons appear in the bar at the bottom of the panel.
- Resolve: use this when you've updated the spec or decided the current plan is good enough. Resolving only marks the finding. It doesn't change the document.
- Dismiss: use this for findings you want to discuss further or decide later.
- Resolve in chat: sends the finding to chat. The review panel stays open and chat pops out over the canvas. The AI offers 2 to 4 ways to fix it in a question card. Pick one or describe your own, and the AI applies it to your spec. The changes arrive as suggestions, so review them as described in Approve and reject AI suggestions.
Handled findings move to the Handled group at the bottom of the list. Select Undo to bring one back.
Go through what's left
With many findings, working through them one by one is faster.
- Select Go through what's left in the bar at the bottom of the panel.
- The first finding expands. When you Resolve or Dismiss it, the next one opens right away.
- Use the Previous finding and Next finding arrows to skip around.
- When you've handled every finding in a lens, select Next: (lens name) in the bar to move on.
Review again
If your PRD or Features change after a review, you'll see "The plan changed since this review; results may be out of date."
- Select Re-review at the top of the panel.
- On the confirmation screen, select Start review. To stay on your current results, select Back to the previous review.
- If a lens couldn't be evaluated this time, its tile shows Eval failed. Review again to include it.
- Results stay with the project, so they're still there when you reopen the panel, and your collaborators see the same results.