Export and connect
Connect AI tools (MCP)
Connect Manyfast to AI tools like ChatGPT, Claude, and Cursor so they can read and write your spec.
MCP is the standard way AI tools connect to other services. Once you connect Manyfast, the AI you already use can read and write your Manyfast spec. Carry your planning chats or the code context from your dev tools straight into your spec.
What you can do
- Read your spec: Project list, PRD, features, user flows, wireframes, and comments.
- Write your spec: Create and edit the PRD, requirements, features, specifications, and product policies, and edit wireframe elements directly. Direct edits like these don't use credits.
- Run AI: Run Manyfast AI chat, and generate user flows and wireframes. These use your group's credits under the same rules as the web app.
- Manage projects: Create, rename, and duplicate projects, move them to the trash or restore them, and save versions. With the right permission, you can also change a project's owner. You can work with folders, sources, and project files too.
Try asking your connected AI:
- "Organize the ideas from our chat into a PRD and core requirements in Manyfast"
- "Read the feature specs and user flows from Manyfast and start building this screen"
- "Read my plan on Manyfast and draft a build plan"
Requirements, features, specifications, and product policies written by an AI tool, along with its edits to an existing PRD, aren't final right away. They arrive as AI suggestions waiting for your approval. Review and approve them in Manyfast, as described in Review AI suggestions.
Open the Connectors screen
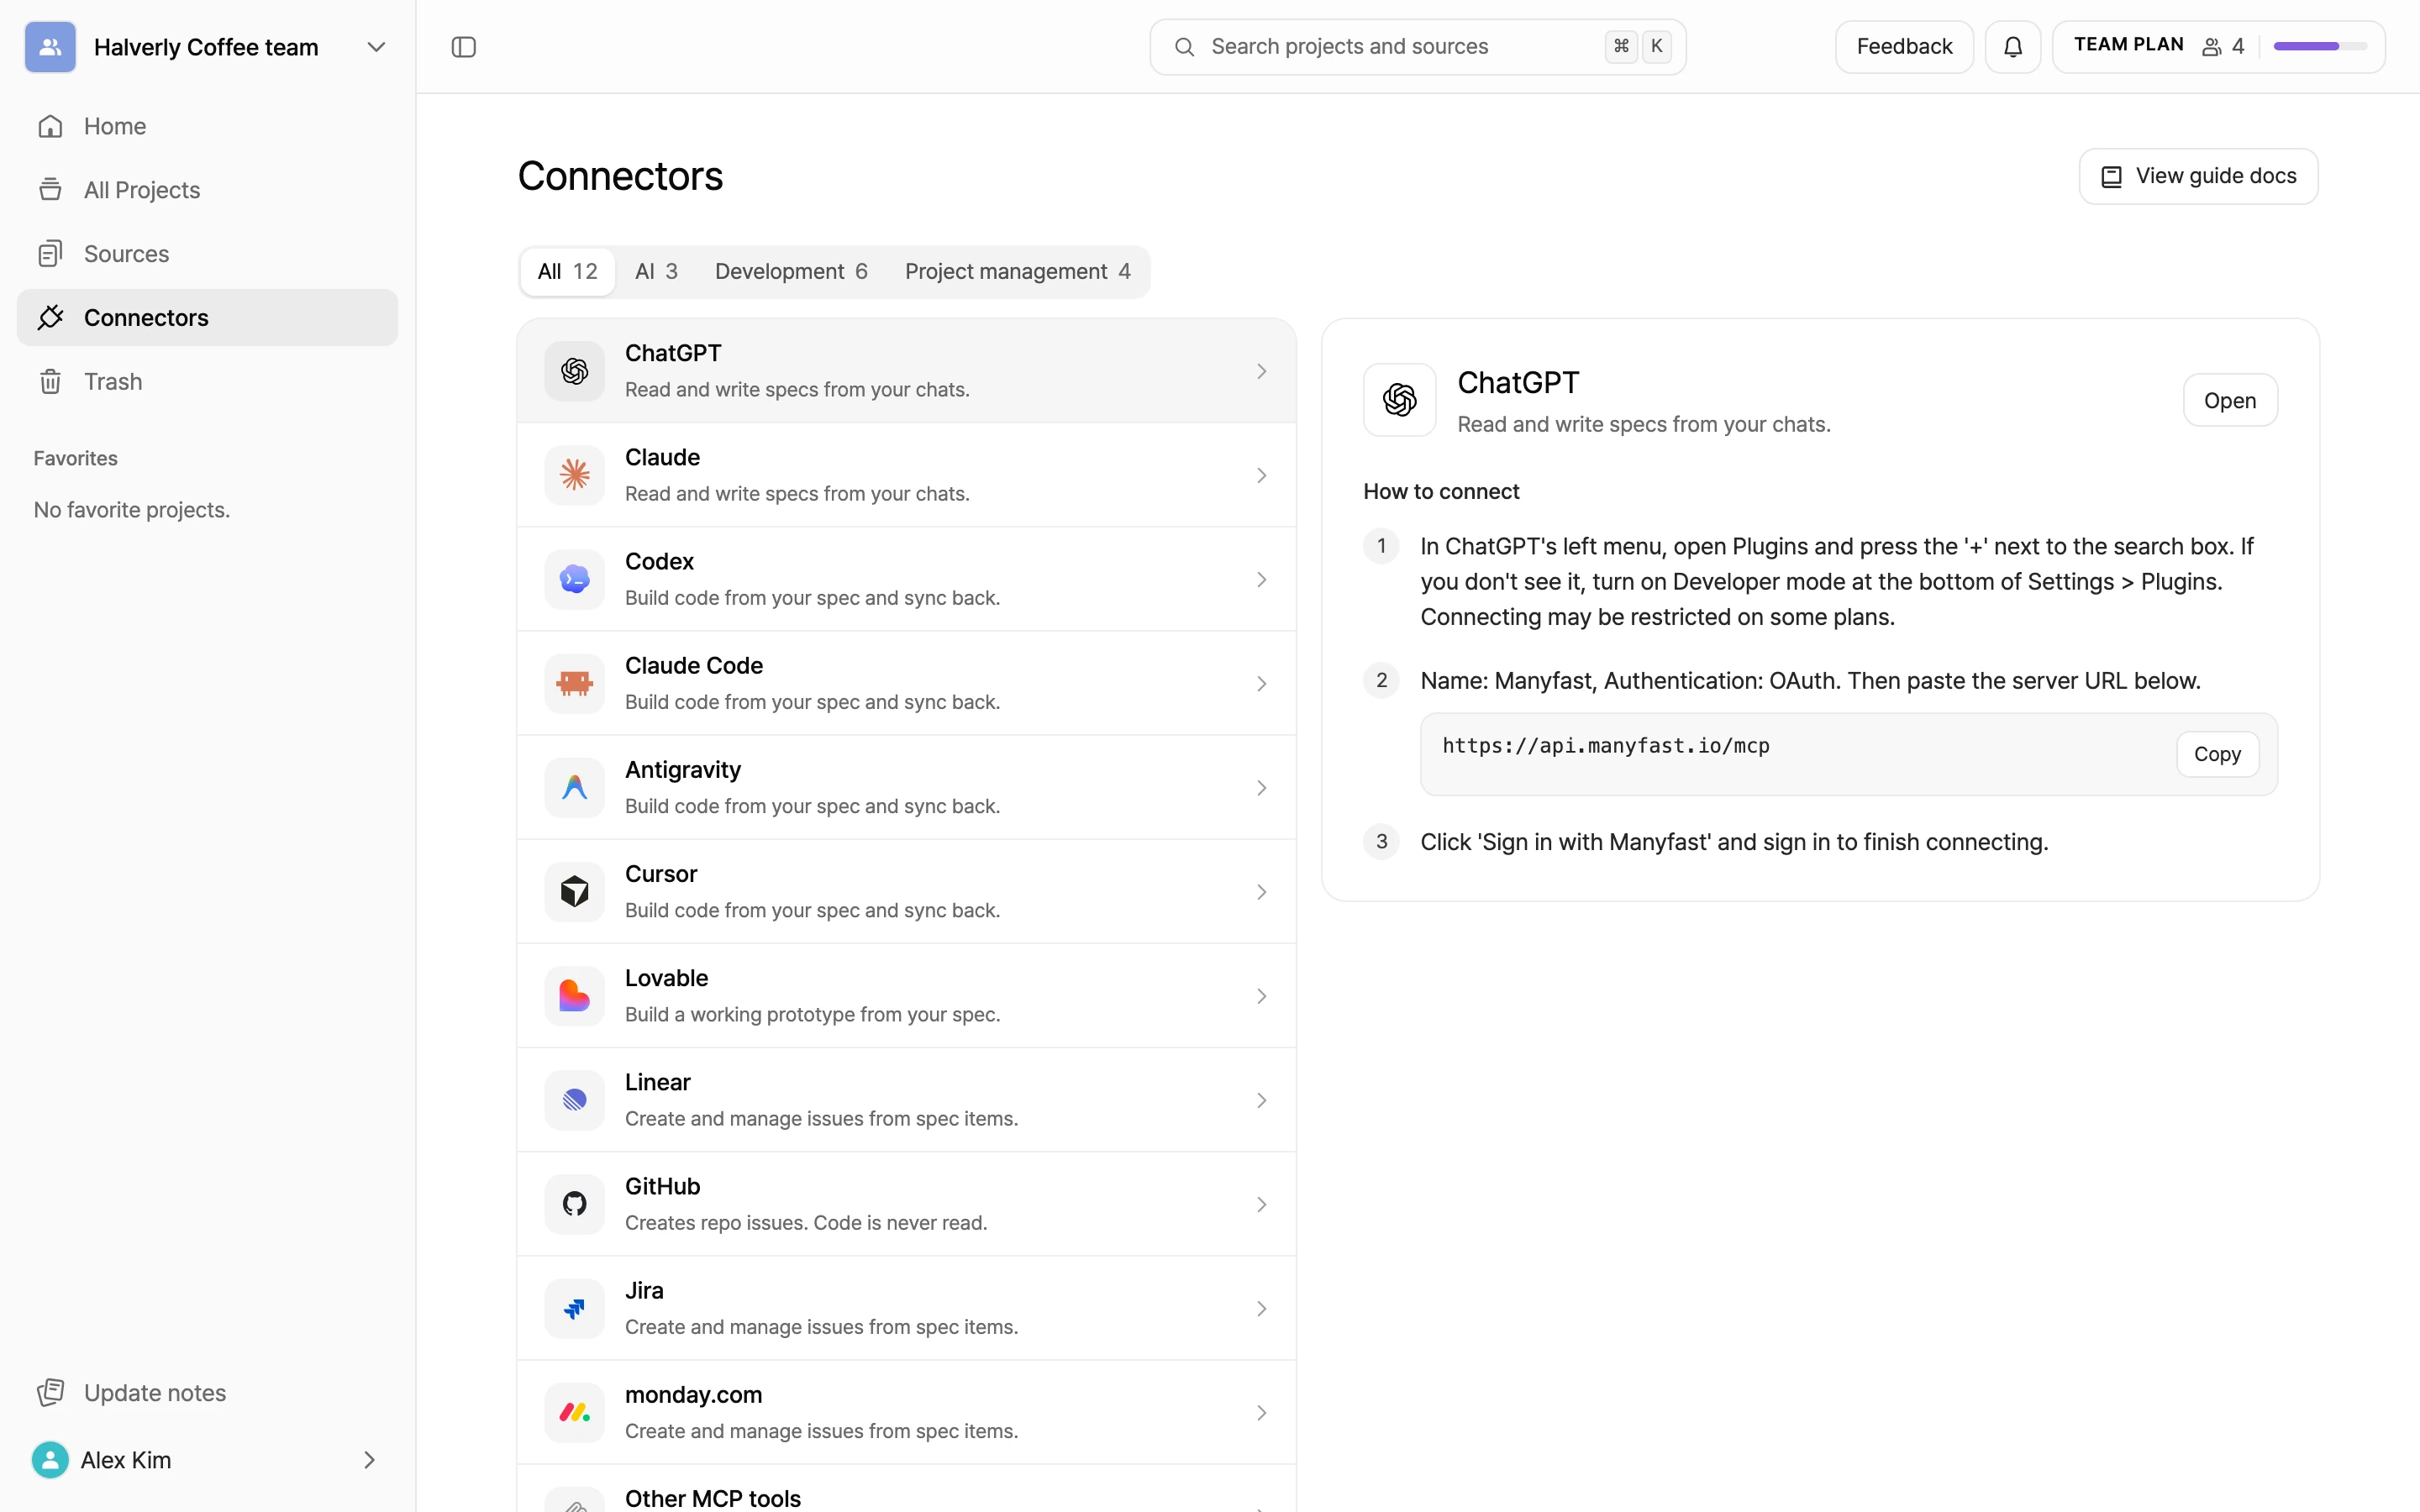
The Connectors screen has step-by-step instructions for each tool. You can open it from any of these:
- Connectors in the sidebar
- Connect your AI tools above the greeting on Home
- Connect in the editor's left rail (opens as a panel inside the editor)
- Click Connectors in the sidebar.
- Narrow the list with the tabs at the top: All, AI, Development, or Project management.
- Pick the tool you want to connect. How to connect appears on the right.
- Follow the steps. Click Copy next to any address, command, or prompt you need to paste. Click Open to launch the tool.
Connection details
Every tool connects with the same details.
| Setting | Value |
|---|---|
| Server URL | https://api.manyfast.io/mcp |
| Connection name | manyfast (use Manyfast in forms that ask for a name) |
| Authentication | OAuth (sign in with your Manyfast account) |
Sign in and approve the connection
Every tool ends with signing in to Manyfast and approving the connection.
- When you start the connection in your AI tool, an MCP Authentication window opens in your browser.
- Click Continue with Google, or enter your email and password and click Sign In. If you're already signed in, click Continue with this account, or click Sign in with a different account to switch.
- On the Approve MCP Connection screen, check that the name next to Client: matches the tool you're connecting. The callback address and permission are shown there too.
- Click Connect with this account. Once you're back in your AI tool, you're connected. To cancel, click Deny connection.
Steps for each tool
Menu names in each tool can change when that tool updates its interface. The Connectors screen always has the latest steps.
ChatGPT
- In ChatGPT's left menu, open Plugins and click the + next to the search box. If you don't see it, turn on Developer mode at the bottom of Settings > Plugins.
- Enter
Manyfastas the name, choose OAuth for authentication, and paste the server URL. - Click Sign in with Manyfast and finish signing in and approving.
Claude
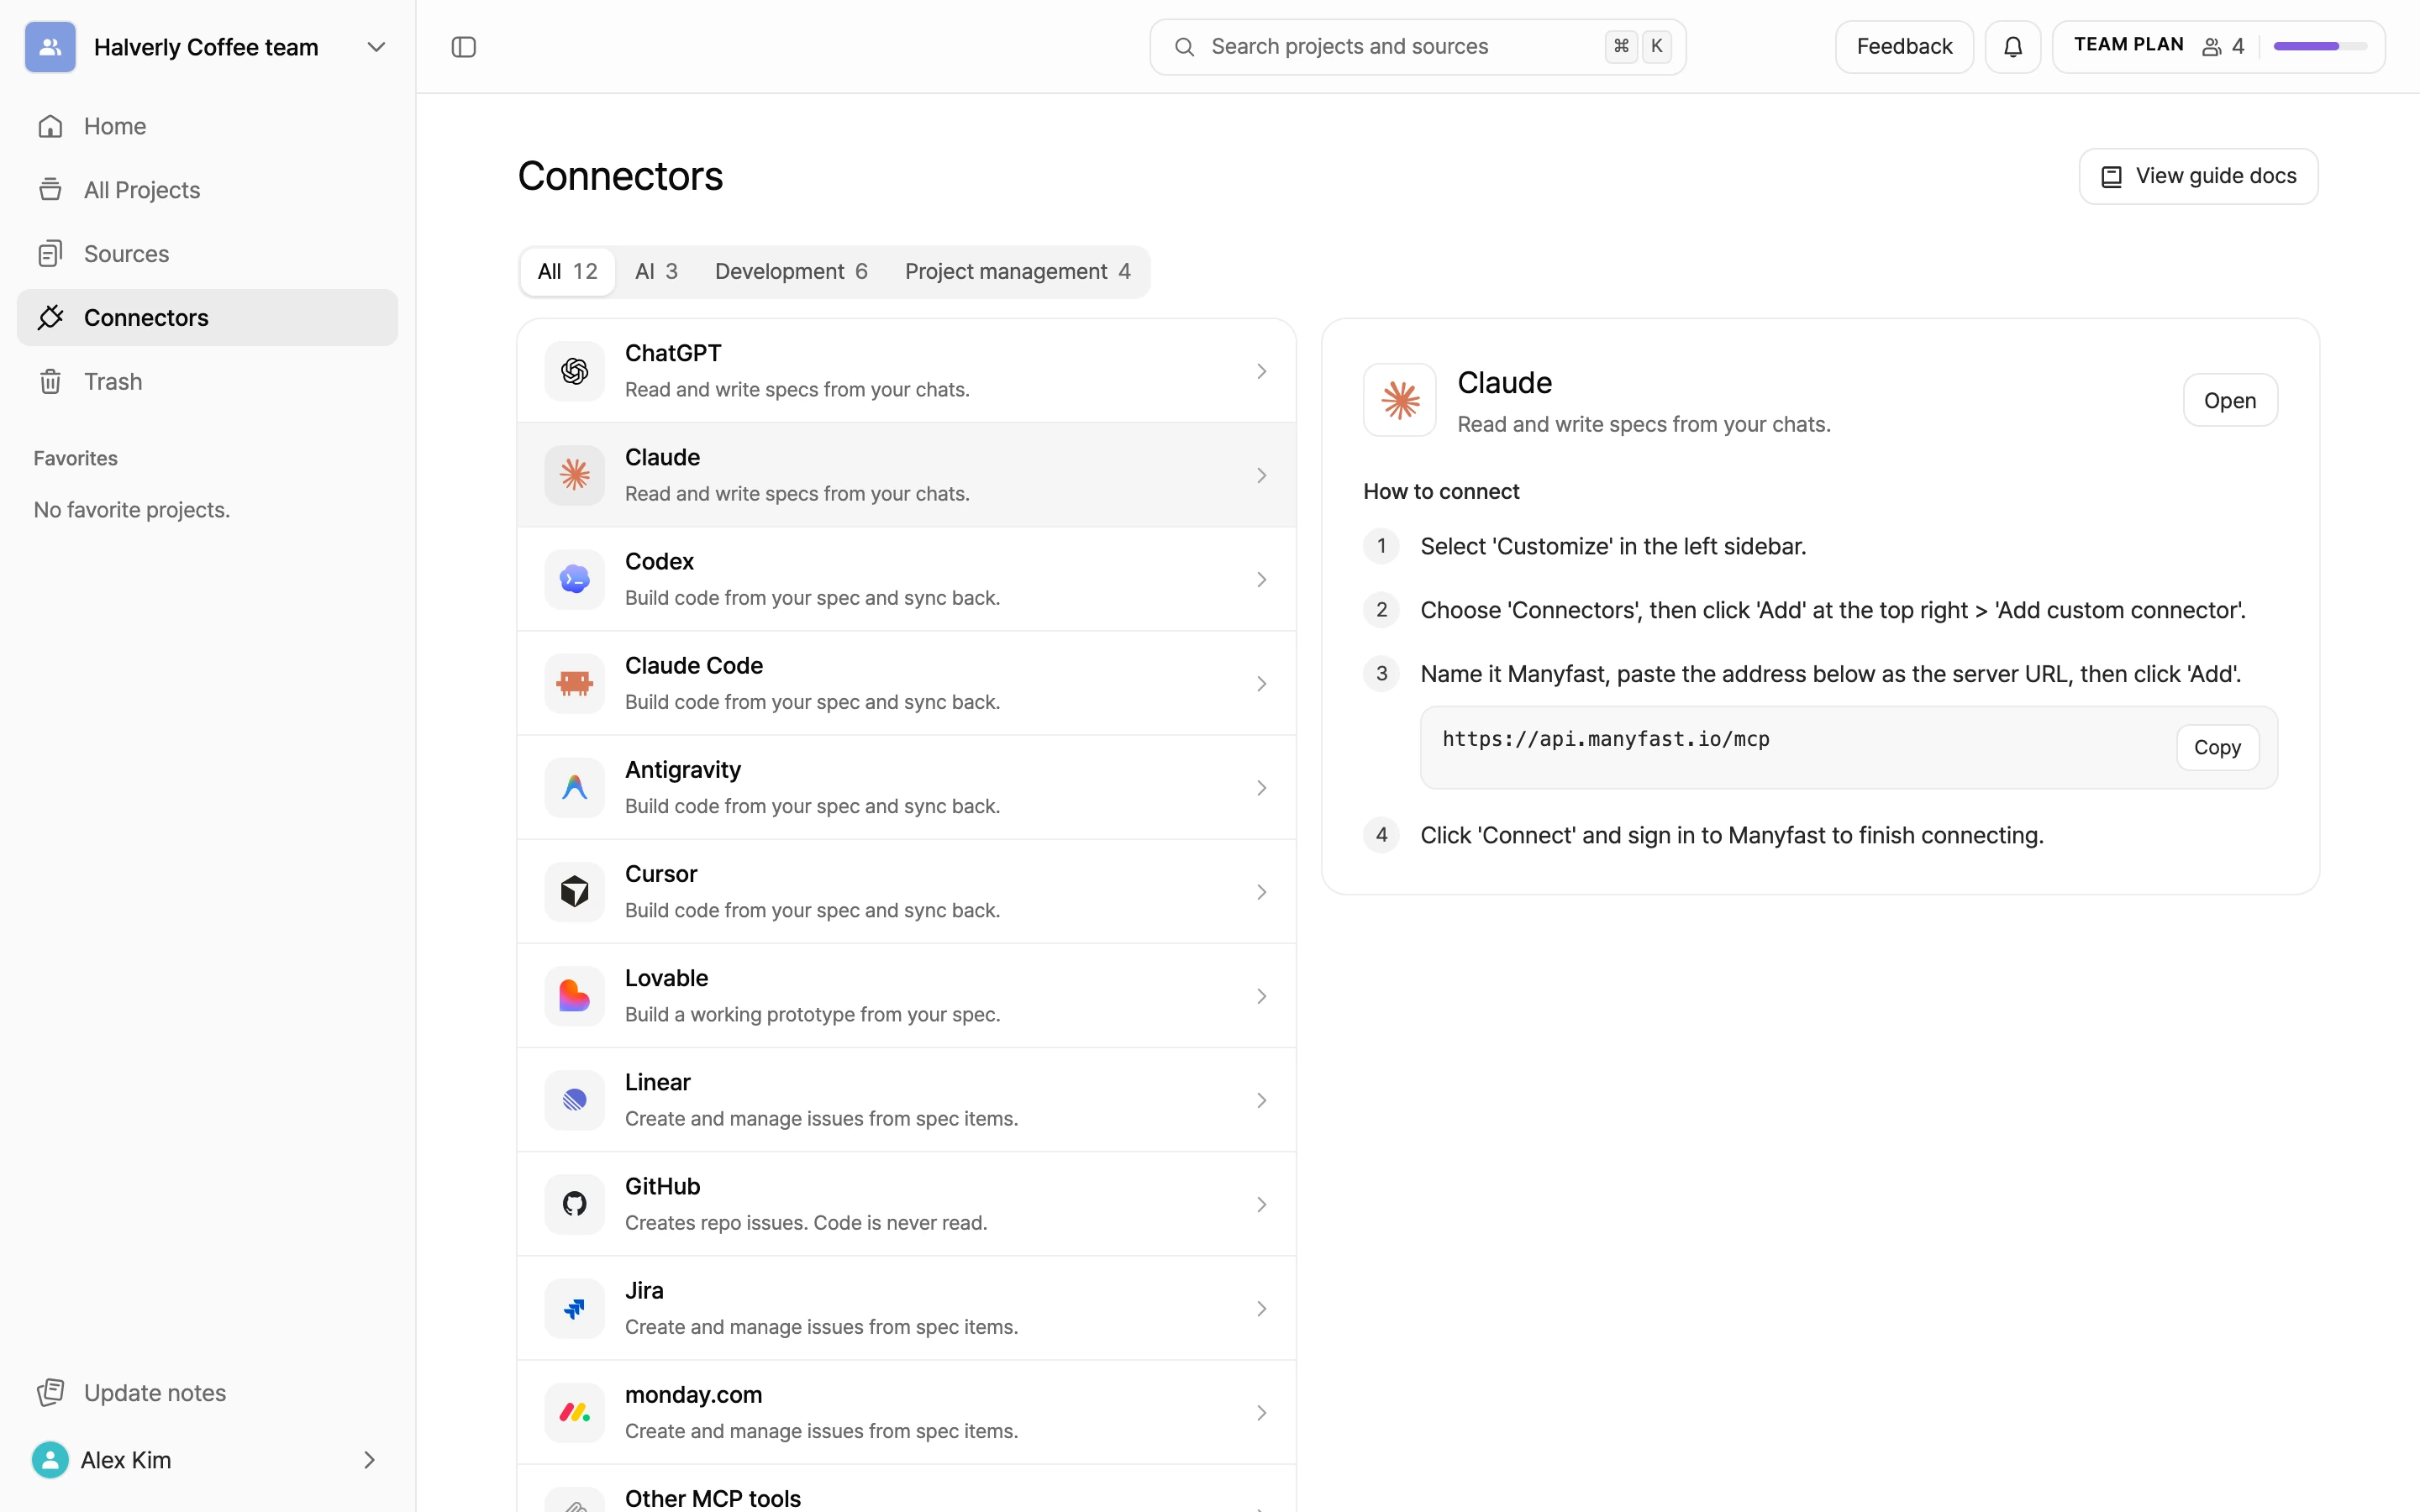
- In Claude, select Customize in the left sidebar.
- Choose Connectors, then click Add at the top right > Add custom connector.
- Enter
Manyfastas the name, paste the server URL, and click Add. - Click Connect and finish signing in and approving.
Codex
- Copy the prompt from the Codex steps on the Connectors screen and run it in the Codex chat. The prompt asks Codex to register the
manyfastserver as a streamable HTTP server in its global config (~/.codex/config.toml), then runcodex mcp login manyfastto complete OAuth. - When your browser opens, finish signing in and approving.
- Restart Codex to finish connecting.
Claude Code
-
Paste and run this command in your terminal. The
--scope userflag connects Manyfast no matter which folder you open Claude Code in.claude mcp add --transport http manyfast https://api.manyfast.io/mcp --scope user -
Run
claude, type/mcpin the chat, and select manyfast. -
Choose Authenticate and finish signing in and approving.
Antigravity
-
Copy the prompt from the Antigravity steps on the Connectors screen and run it in the Antigravity chat. The prompt asks Antigravity to add the config below to both
~/.gemini/config/mcp_config.jsonand~/.gemini/antigravity/mcp_config.json. It also asks Antigravity to open any file it can't edit directly. If that happens, paste the config yourself.{ "mcpServers": { "manyfast": { "serverUrl": "https://api.manyfast.io/mcp" } } } -
Go to Settings > Customizations > Installed MCP Servers and click Refresh.
-
Click Authenticate next to manyfast and finish signing in and approving.
Cursor
- Copy the prompt from the Cursor steps on the Connectors screen and run it in the Cursor chat. The prompt asks Cursor to register the
manyfastserver as a remote HTTP MCP undermcpServersin your global user config (~/.cursor/mcp.json). - In Cursor Settings > Tools & MCPs, find manyfast in the Installed MCP Servers list.
- Click Connect next to manyfast and finish signing in and approving.
Lovable
- In Lovable, click Connectors in the left sidebar and choose Custom.
- Enter
Manyfastas the name and paste the server URL. - Click Add & authorize and finish signing in and approving.
Other MCP tools
Tools that aren't listed can still connect if they support remote MCP servers and OAuth authentication. Add https://api.manyfast.io/mcp as the server URL in the tool's MCP settings, and use manyfast if it asks for a name. When the sign-in window opens, finish signing in and approving.
Troubleshooting
-
If you see The Manyfast connection saved in your AI tool has expired or can no longer be used., close the window, clear the sign-in details for the Manyfast connection in your AI tool, and connect again.
-
In Claude Code, run this command in your terminal, then connect again. If you added the connection under a different name, use that name instead of
manyfast.claude mcp logout manyfast -
If you see Invalid authentication request., close the window and start a new connection from your AI tool.
-
If you see Connection denied, the connection wasn't approved. Start a new connection from your AI tool when you're ready.
-
If you're connected but requirements or features aren't being written, check the plan of the project's group (Compare plans) and your role. Viewers can only read.