Team and sharing
Create and manage groups
Create and switch between groups, edit group details, and leave or delete a group.
A group is the workspace your team shares. Projects, members, plan, and credits all belong to a group. If you're in more than one group, each one has its own projects and its own set of features.
The group menu
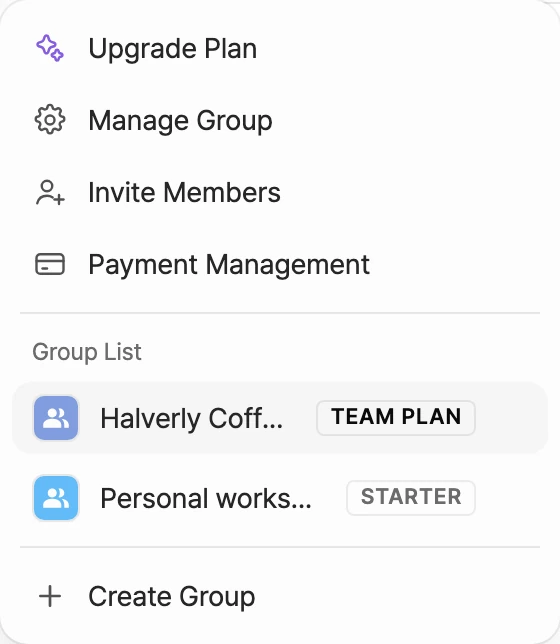
Click the group name at the top of the sidebar to open the group menu. If the sidebar is collapsed, click the group icon at the top instead.
The menu has these items:
- Upgrade Plan: opens the plans window. Only the group owner and admins see it.
- Manage Group: takes you to Group Information in the group admin screen.
- Invite Members: takes you to Members in the group admin screen.
- Payment Management: takes you to Payment Management in the group admin screen. Only the group owner and admins see it.
- Group List: every group you belong to. Each group shows its plan badge, and the group you're in is highlighted in gray.
- Create Group: makes a new group.
Create a group
- Click the group name at the top of the sidebar to open the group menu.
- Click Create Group at the bottom.
- Enter a Group Name. It can be up to 15 characters.
- If you like, upload a Group Image.
- Click Create.
You're taken straight to the new group, and you become its group owner. New groups start on the Starter plan.
Switch groups
- Click the group name at the top of the sidebar.
- In Group List, click the group you want.
The app switches to that group's projects and settings. Plans and credits are per group too, so the plan and credit display in the top bar update to match.
The group admin screen
Click Manage Group in the group menu to open the group admin screen. Use the menu on the left to move between pages.
| Menu | What you do there |
|---|---|
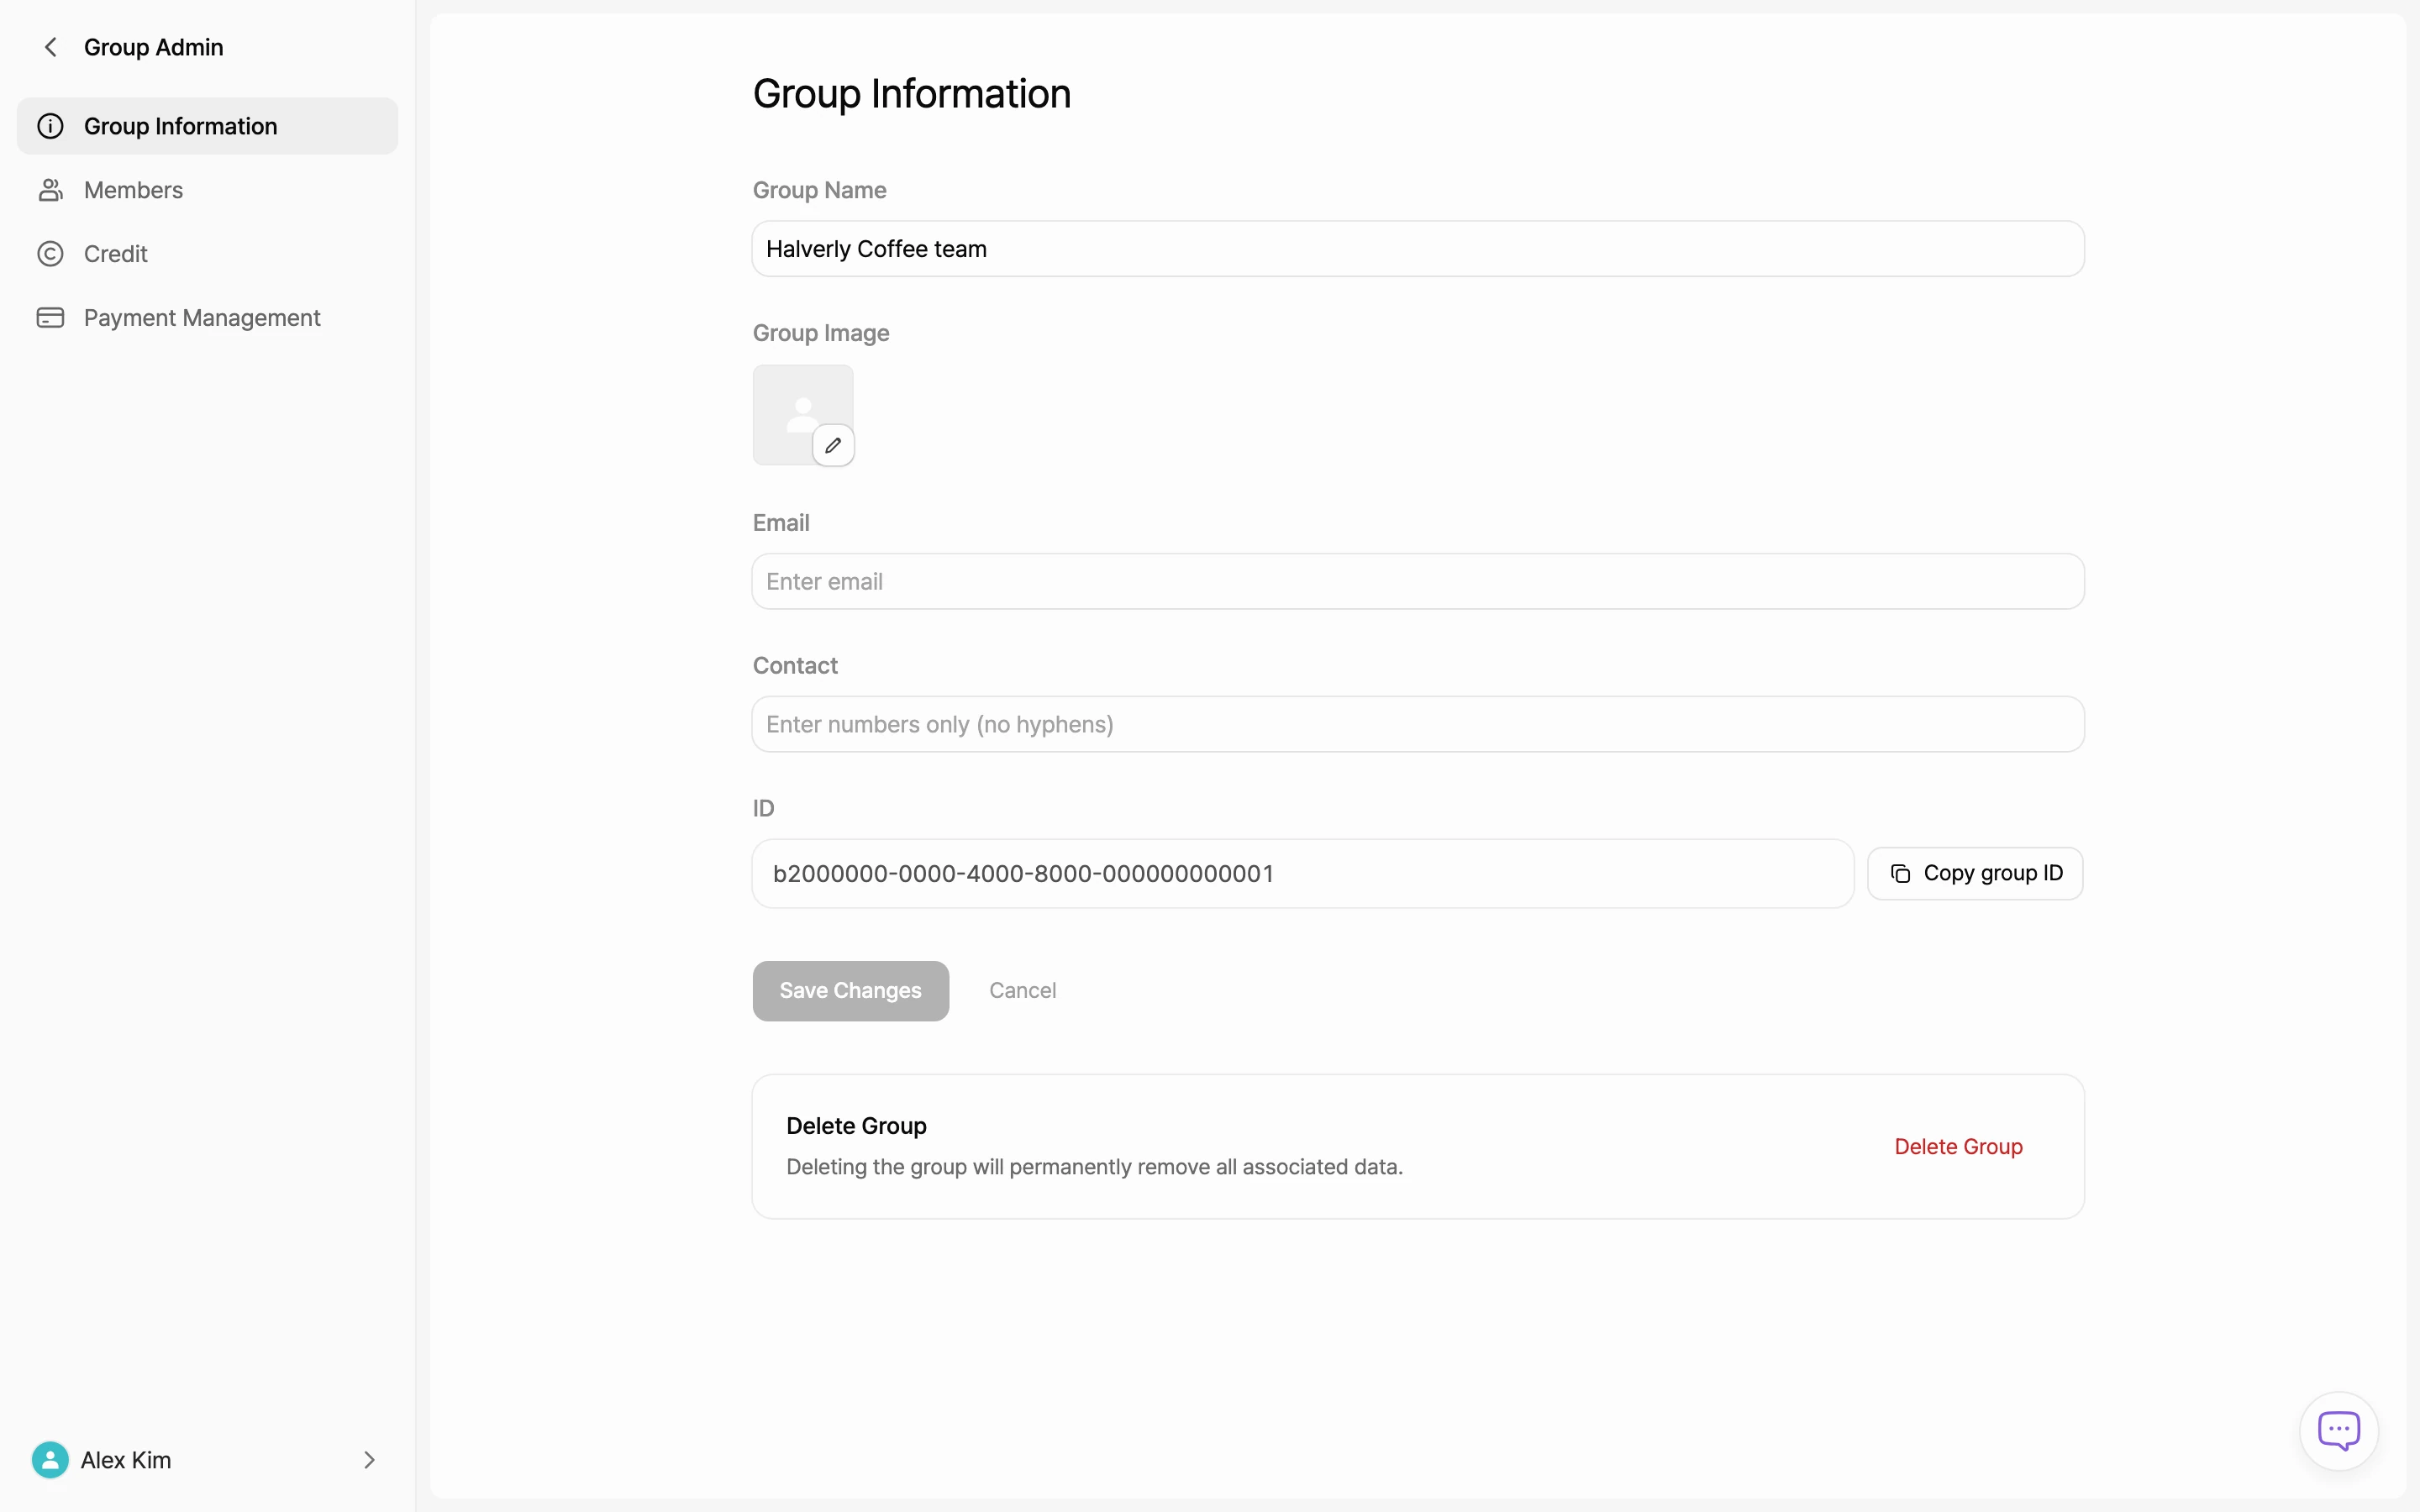
| Group Information | Edit the group name, image, email, and contact number, and copy the group ID. You also leave or delete the group here. |
| Members | Invite members, change their roles, or remove them. |
| Credit | See the group's credits and usage history. |
| Payment Management | Manage the current plan and billing details. |
Viewers don't see Credit, and only the group owner and admins see Payment Management. Click Group Admin at the top to go back to your group.
Edit group details
- In the group menu, click Manage Group. The Group Information page opens.
- Change what you need:
- Group Name: up to 15 characters
- Group Image
- Contact: digits only, no hyphens, 9 to 11 digits
- Click Save Changes. To undo your edits, click Cancel.
If you try to leave the page without saving, you'll be asked to confirm.
Copy the group ID
The group ID is a unique value assigned when the group is created. Someone in another group needs it to request a copy of their project into your group.
- Go to Manage Group > Group Information.
- Next to ID, click Copy group ID.
- Send the ID to the person making the request.
To learn how to copy a project into another group, see Projects and folders.
Leave a group
Anyone except the group owner can leave a group on their own.
- Go to Manage Group > Group Information.
- At the bottom of the page, click Leave Group.
- In the dialog, click Leave Group again.
You're taken to Home. What happens to your access depends on the project:
- Projects you could open as a group member: You can no longer open or save these. However, tabs you already have open can keep saving until the connection drops, and share links that haven't expired or been deactivated keep opening in read-only mode.
- Projects you created or have owned, and projects shared with you individually: Your access stays. You can still open these from the project's URL or a connected AI tool, and edit them if you have edit access. Projects you didn't create also appear under Shared with me.
Either way, you can no longer use the group's credits for AI. To rejoin, ask the group owner or an admin to invite you again. To see how the remaining access can be ended, check Roles and permissions.
Delete a group
The group owner sees Delete Group at the bottom of Group Information instead of Leave Group.
- Go to Manage Group > Group Information.
- At the bottom of the page, click Delete Group.
- In the dialog, type the group name exactly. The delete button turns on only when the name matches.
- Click Delete Group.