Write your spec
Organize product policies
Capture decisions that span many features, like pricing or data retention, and link them to the items they affect.
A product policy records a decision that applies across many features, such as pricing, security and privacy, or data retention. Policies live in the Features tab. Link each policy to the requirements, features, and specs it touches, and Manyfast reminds you to recheck the policy when one of those items changes.
Add a policy
- Open the Features tab at the top of the editor.
- Select Add product policy in the view you're using.
- Graph view: it's right under the PRD card. Once you have policies, use the + next to the Product Policies group name.
- Directory view or the navigator's Feature outline: it's a row in the Product Policies group, or in the + menu above the list.
- The new policy opens on How do you want to start this policy? Pick a starting point below.
Choose how to start
A new policy opens on a start screen before the editor. Pick one of three options and the editor opens.
Start from a template
Under Start from a template, pick a policy type. Manyfast lays out the sections that type usually needs, with a faint example in each empty section. If the policy doesn't have a name yet, it takes the template's name. You can change the name and every section afterward.
| Template | Sections it adds |
|---|---|
| Business model & pricing | Plans & tiers, Billing rules, Scope, Out of scope |
| Security & privacy | Data collected & purpose, Auth & sessions, Storage & encryption, Out of scope |
| Data retention & deletion | Retention periods, Account deletion, Backup & recovery, Exceptions |
| Permissions & roles | Roles, Permissions per role, Invite & change rules, Exceptions |
| Operations, refunds & support | Refunds & cancellation, Support, Sanctions, Exceptions |
| Supported environments | Platforms & minimum versions, Unsupported environments, Offline & slow networks, Out of scope |
Get AI suggestions
- Under Get AI suggestions, select Analyze the plan. AI reads your PRD and features and picks the policies this plan needs.
- Each candidate shows a policy name and why it's needed. Select Show outline to preview its sections.
- Select Start with this on the one you want. The policy starts with its name, section outline, and links to the items it's based on.
If a policy with the same name already exists, the candidate shows Already covered. The results stay with the project, so you can pick from the same list when you create another policy, without running the analysis again. To run it again, select Re-analyze.
Start with a blank page
Select Start with a blank page to open the editor with no sections. This works well when you already know what to write.
Write the policy
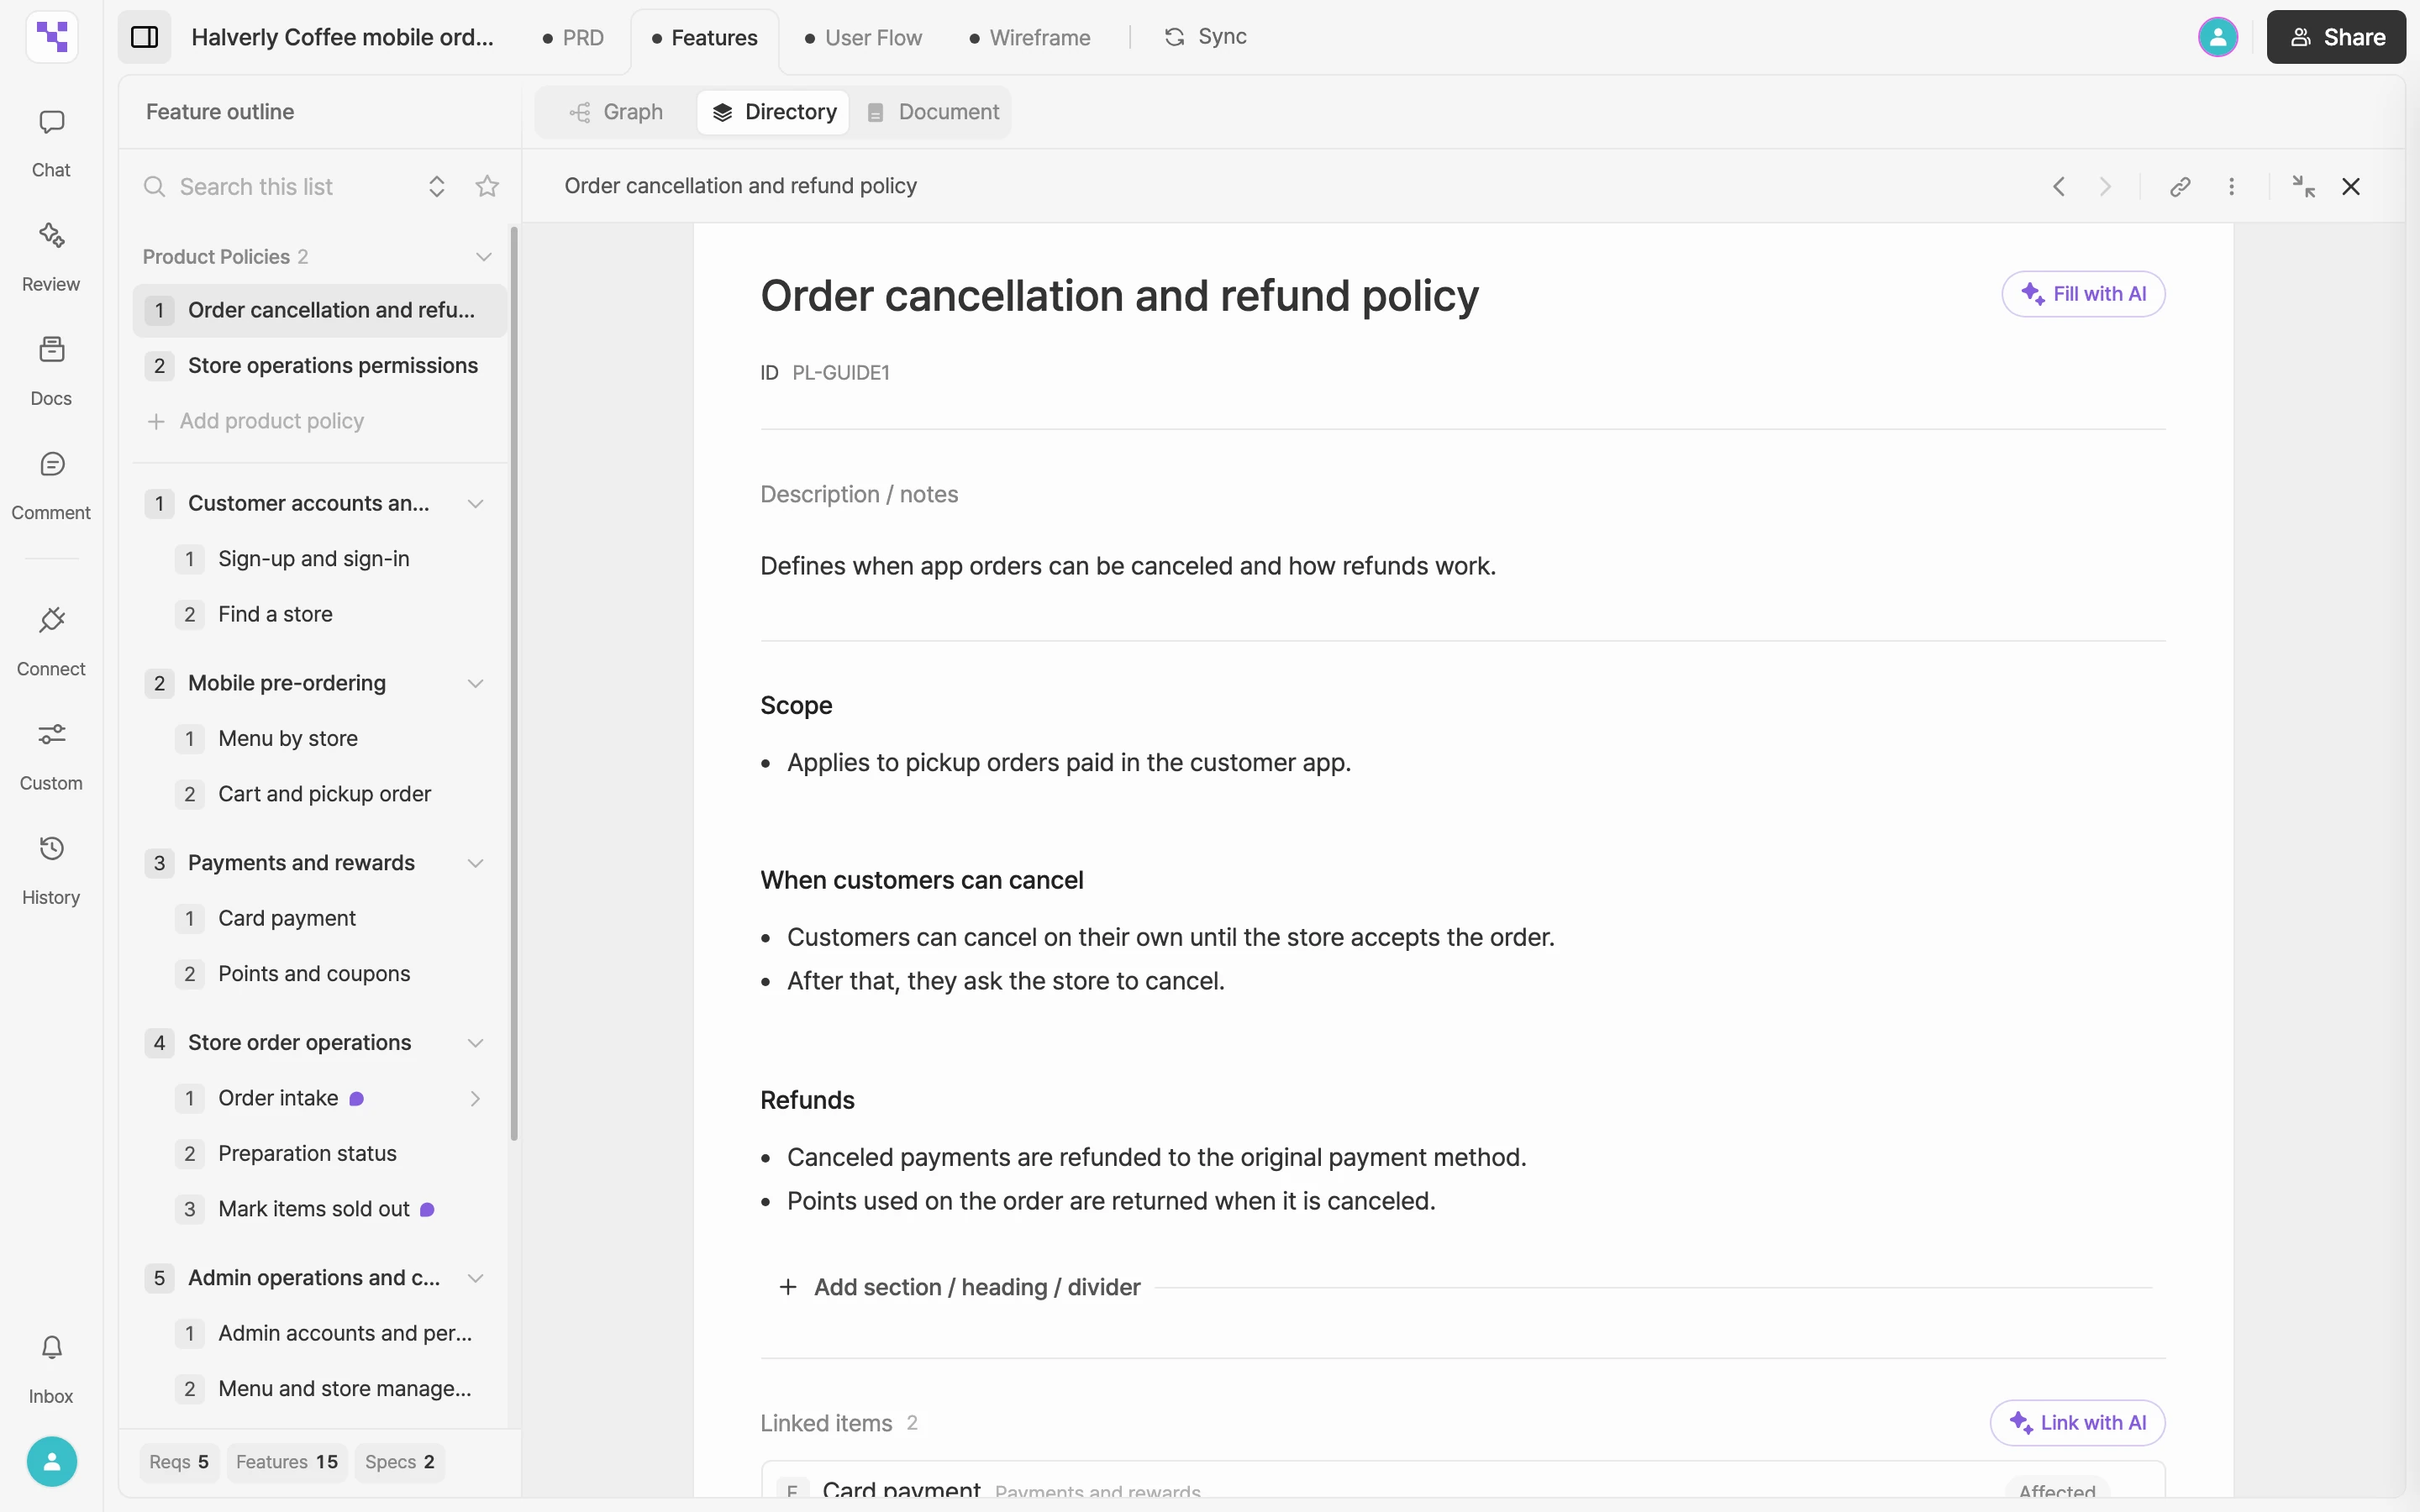
From top to bottom, a policy has a name, Description / notes, its sections, and Linked items.
- Name: say what the policy decides.
- Description / notes: describe the direction and background in a sentence or two. Notes that don't fit a section go here too.
- Sections: hold the actual rules. Hover between sections, or use the last row, and select Add section / heading / divider to choose Add section, Add heading, or Add divider. Hover over a section to show its handle on the left, then drag it to reorder.
Fill with AI
- Name the policy first. Without a name, AI can't tell what the policy is about and won't fill it.
- Select Fill with AI next to the name.
- AI fills the empty sections and leaves a question wherever it can't decide on its own. It may also propose item links.
- Review the proposal, then select Approve or Reject.
- For any questions left after you approve, pick one of the options, or select Write your own, type your answer, and select Submit answer.
Link items
Linked items shows which requirements, features, and specs relate to this policy. Each link has a type:
- Affected: an item whose behavior this policy decides. New links start as this type.
- Basis: an item the policy is built on.
Link items yourself
- In the search box under Linked items (Search requirements, features, or specs to link), type a name or an ID.
- Pick the item from the list.
- To change the type, select the type label next to the item to switch between Affected and Basis.
Select a linked item to jump to it. To remove a link, hover over the item and select ×.
Link with AI
- Give the policy a name or some content first. AI needs it to find related items.
- Select Link with AI next to Linked items. AI looks through all your features for items this policy applies to.
- The proposed links are added to the policy for review. Select Approve or Reject.
Check policies that need review
If a linked item's name or description changes after you link it, the policy shows Needs review so you can confirm it still holds.
- Needs review appears next to the Linked items heading, and a dot marks each item that changed.
- When you edit and save a linked item yourself, a notice tells you that linked policies need review. Select View to go to them.
- On a requirement, feature, or spec, Policies referencing this item lists the policies it's linked to.
When you've checked the change:
- Open the changed item and update the policy or the item as needed.
- In the policy's Linked items, select Mark reviewed next to that item. The flag goes away.