Team and sharing
Share with a link
Create read-only links that let people outside your group view your spec, with their own scope and expiration.
A share link lets anyone open your spec in a browser, even if they aren't in your group. Use it when people only need to look, like a contractor reviewing scope or a client signing off. Each link has its own name, scope, and expiration, so you can keep a separate link for each audience.
Open the share link tab
- Open the project you want to share.
- Click Share on the right side of the top bar. The Share project panel opens.
- Click the Share link tab.
Create a link
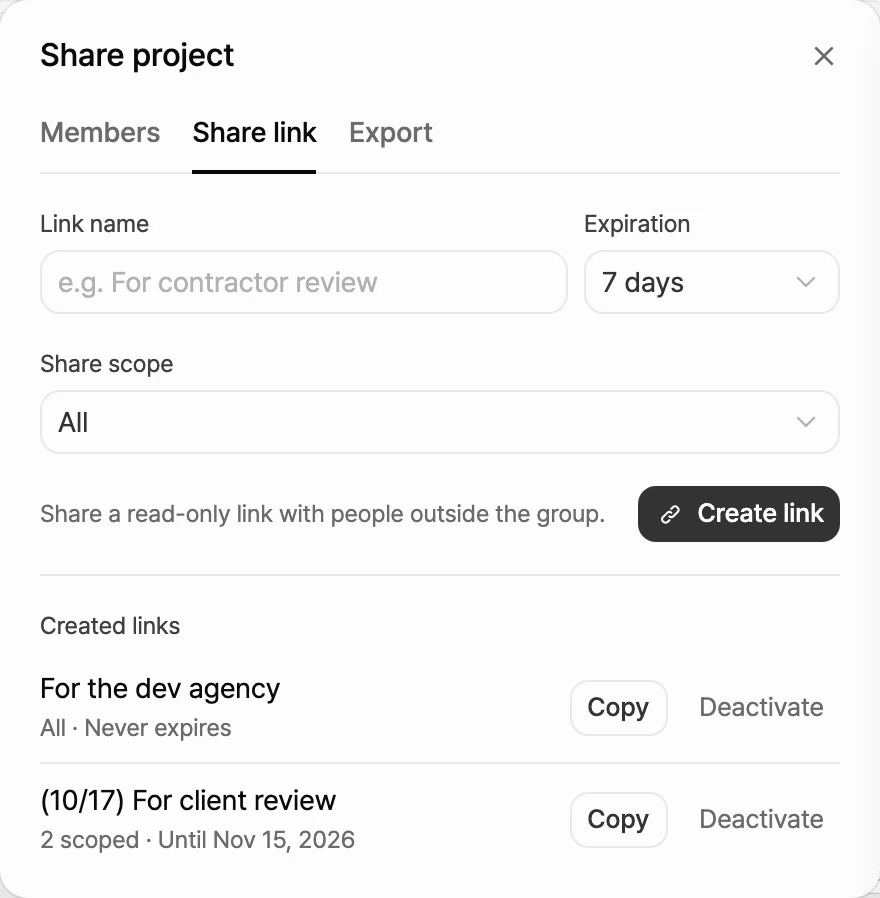
- In Link name, describe who the link is for, such as "For contractor review". If you leave it blank, the link shows up as Unnamed link.
- Under Expiration, choose 7 days, 30 days, or Never. 7 days is selected by default.
- Choose a Share scope. Pick All to share the whole project, or Scoped to share only part of it. See Choose what to share.
- Click Create link.
The link is copied to your clipboard as soon as it's created. Paste it into a chat or email to send it.
Choose what to share
When you set Share scope to Scoped, check the documents you want to include. You need at least one before you can click Create link.
- PRD
- Feature Spec: When checked, a requirement picker appears below it. Leave it on All requirements to share the whole Features document, or pick specific requirements to share only those. If there are many requirements, use Search requirements to find them.
- User Flow
- Wireframe
- Product Policy: If you share policies without Feature Spec, viewers see the policies inside an otherwise empty Features tab.
Manage your links
Created links lists every link that still works. Each row shows the link name, its scope (All or N scoped), and when it expires.
- Copy: Copy the URL again.
- Deactivate: Turn the link off. Confirm by clicking Deactivate link.
Links disappear from the list once they expire. Anyone who opens an expired or deactivated link sees This share link has expired or been deactivated.
What viewers see
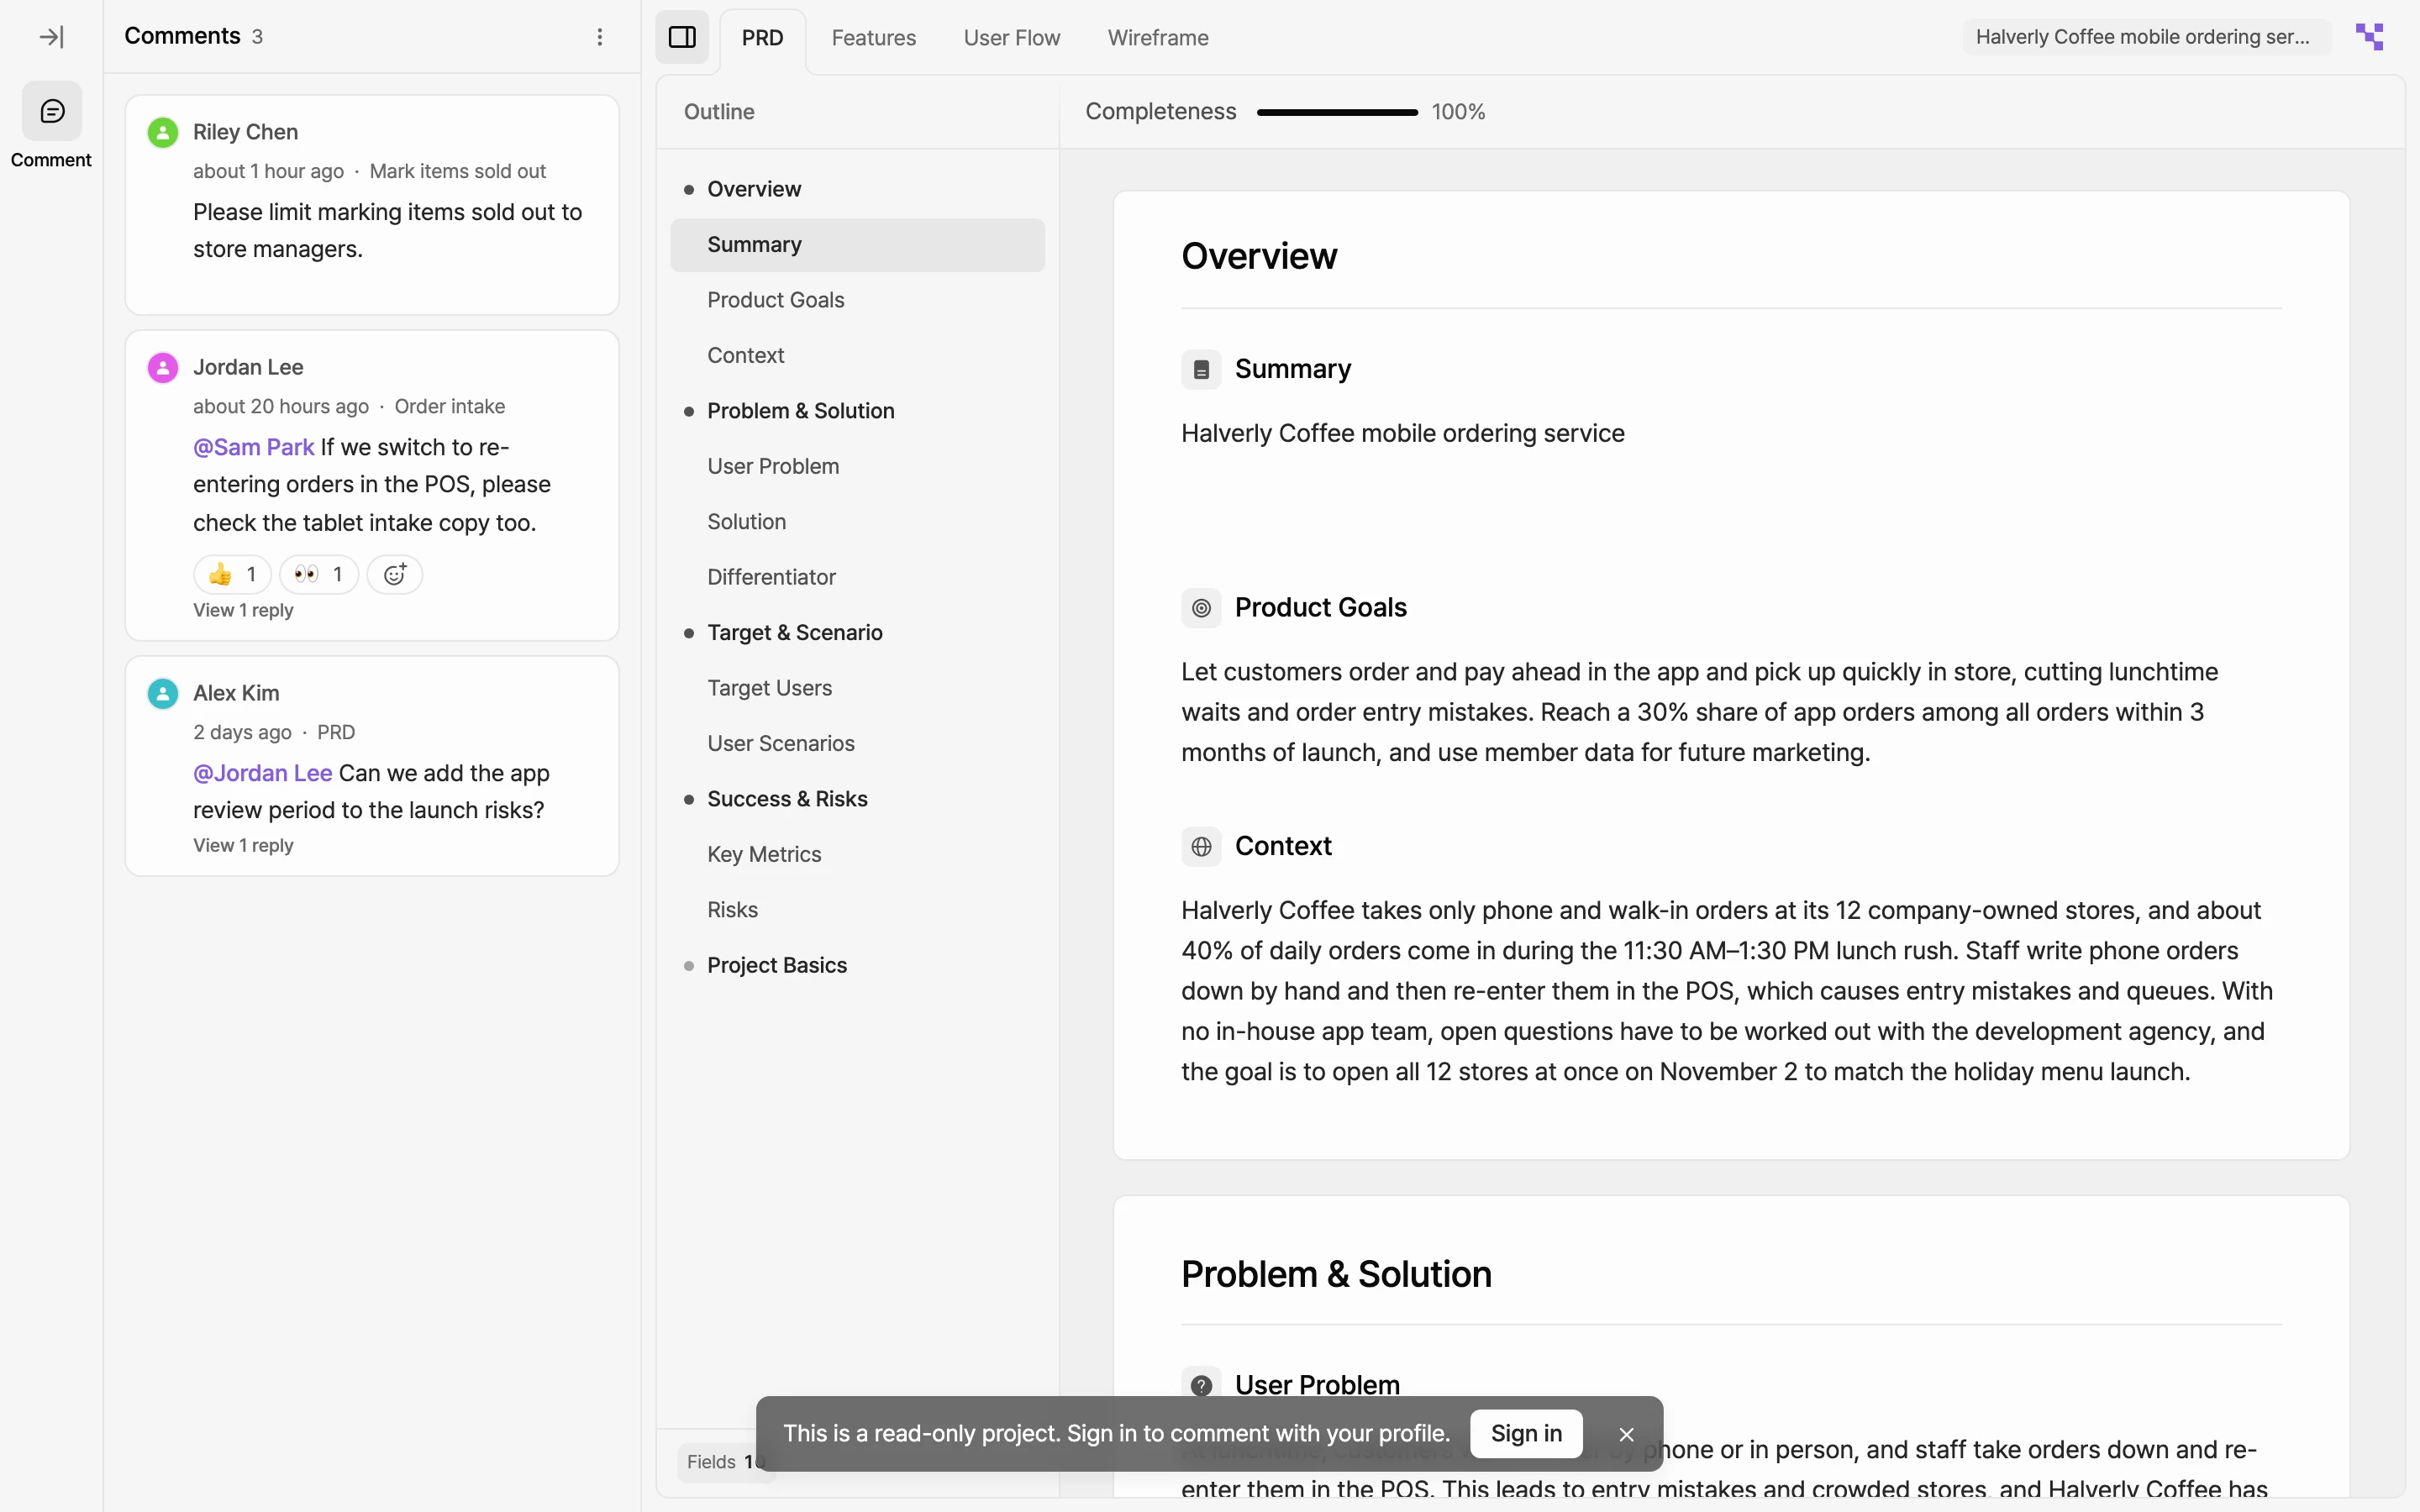
Viewers don't need to sign in to open the link. The page looks like the editor, but nothing can be changed.
- Only the documents in the share scope can be opened. Hovering over a tab outside the scope shows This area is not included in the share scope.
- When you edit the project, the open share page picks up the changes.
- A bar at the bottom of the screen tells viewers where they stand and what they can do next. They can close it.
- If a member of your group opens the link while signed in, they go straight to the editor instead.
Comments from viewers
Viewers can leave feedback too. On wide screens, the Comments panel is already open, and Comment in the rail closes or reopens it. Leaving a comment works the same way as Comments and notifications.
- Viewers who aren't signed in post as Guest N. They can click Change name to pick a display name.
- Signed-in viewers post under their profile name. Clicking Sign in in the bottom bar opens a sign-in window without leaving the page.
- Emoji reactions require signing in.
- Viewers can edit or delete comments they wrote on the share page. Comments that have replies can't be deleted.
- Mentioning people and resolving comments only work in the editor.
Request access to edit
If a signed-in viewer isn't a member of your group, the bottom bar shows Request access.
- The viewer clicks Request access. The bar changes to Your request has been sent. Waiting for admin approval.
- Group owners and admins get a join request notification. They can click Accept in the notification, or go to Manage Group > Members, open the Join Requests tab, and click Approve.
- Once approved, the viewer joins the group as a Member. They can click Go to Editor in the bottom bar to start editing.
If the group has no room for them, the approval fails. In that case, see When you can't invite.
Next steps
- Invite external editors: Give someone outside your group edit access to a single project.
- Comments and notifications: Read and reply to feedback from viewers.
- Export your spec: Send files instead of a link. You can also start from the Export tab in the Share project panel.
- Roles and permissions: Check who can do what.