Files and sources
Keep sources in Sources
Collect meeting notes, memos, and AI chats as sources your whole group can read and edit together.
Sources is your group's shared space for the writing behind your plans, such as meeting notes, memos, and conversations with AI. Each entry in Sources is called a source. Group members can read and edit sources together, and AI can pull the decisions out of a source so you can apply them to your spec.
Open Sources
Select Sources in the sidebar. If you can't see any projects, folders, or sources in your group yet, Sources and All Projects are locked. Projects and folders in the trash, or ones you can't see because of folder access, don't count even though they're in your group. Hover over a locked menu to see Available after you create a project. Both unlock once you create your first project. See Tour the workspace.
Select the question mark next to the Sources title (How to use Sources) to open Ways to use Sources. While the top-level list is empty, the same tips show right on the screen, except for viewers.
To find a source from anywhere, use Search projects and sources in the top bar (⌘K, Windows Ctrl+K).
Browse your sources
Sources are listed in a table with Source, Participants, and Date columns, 20 per page.
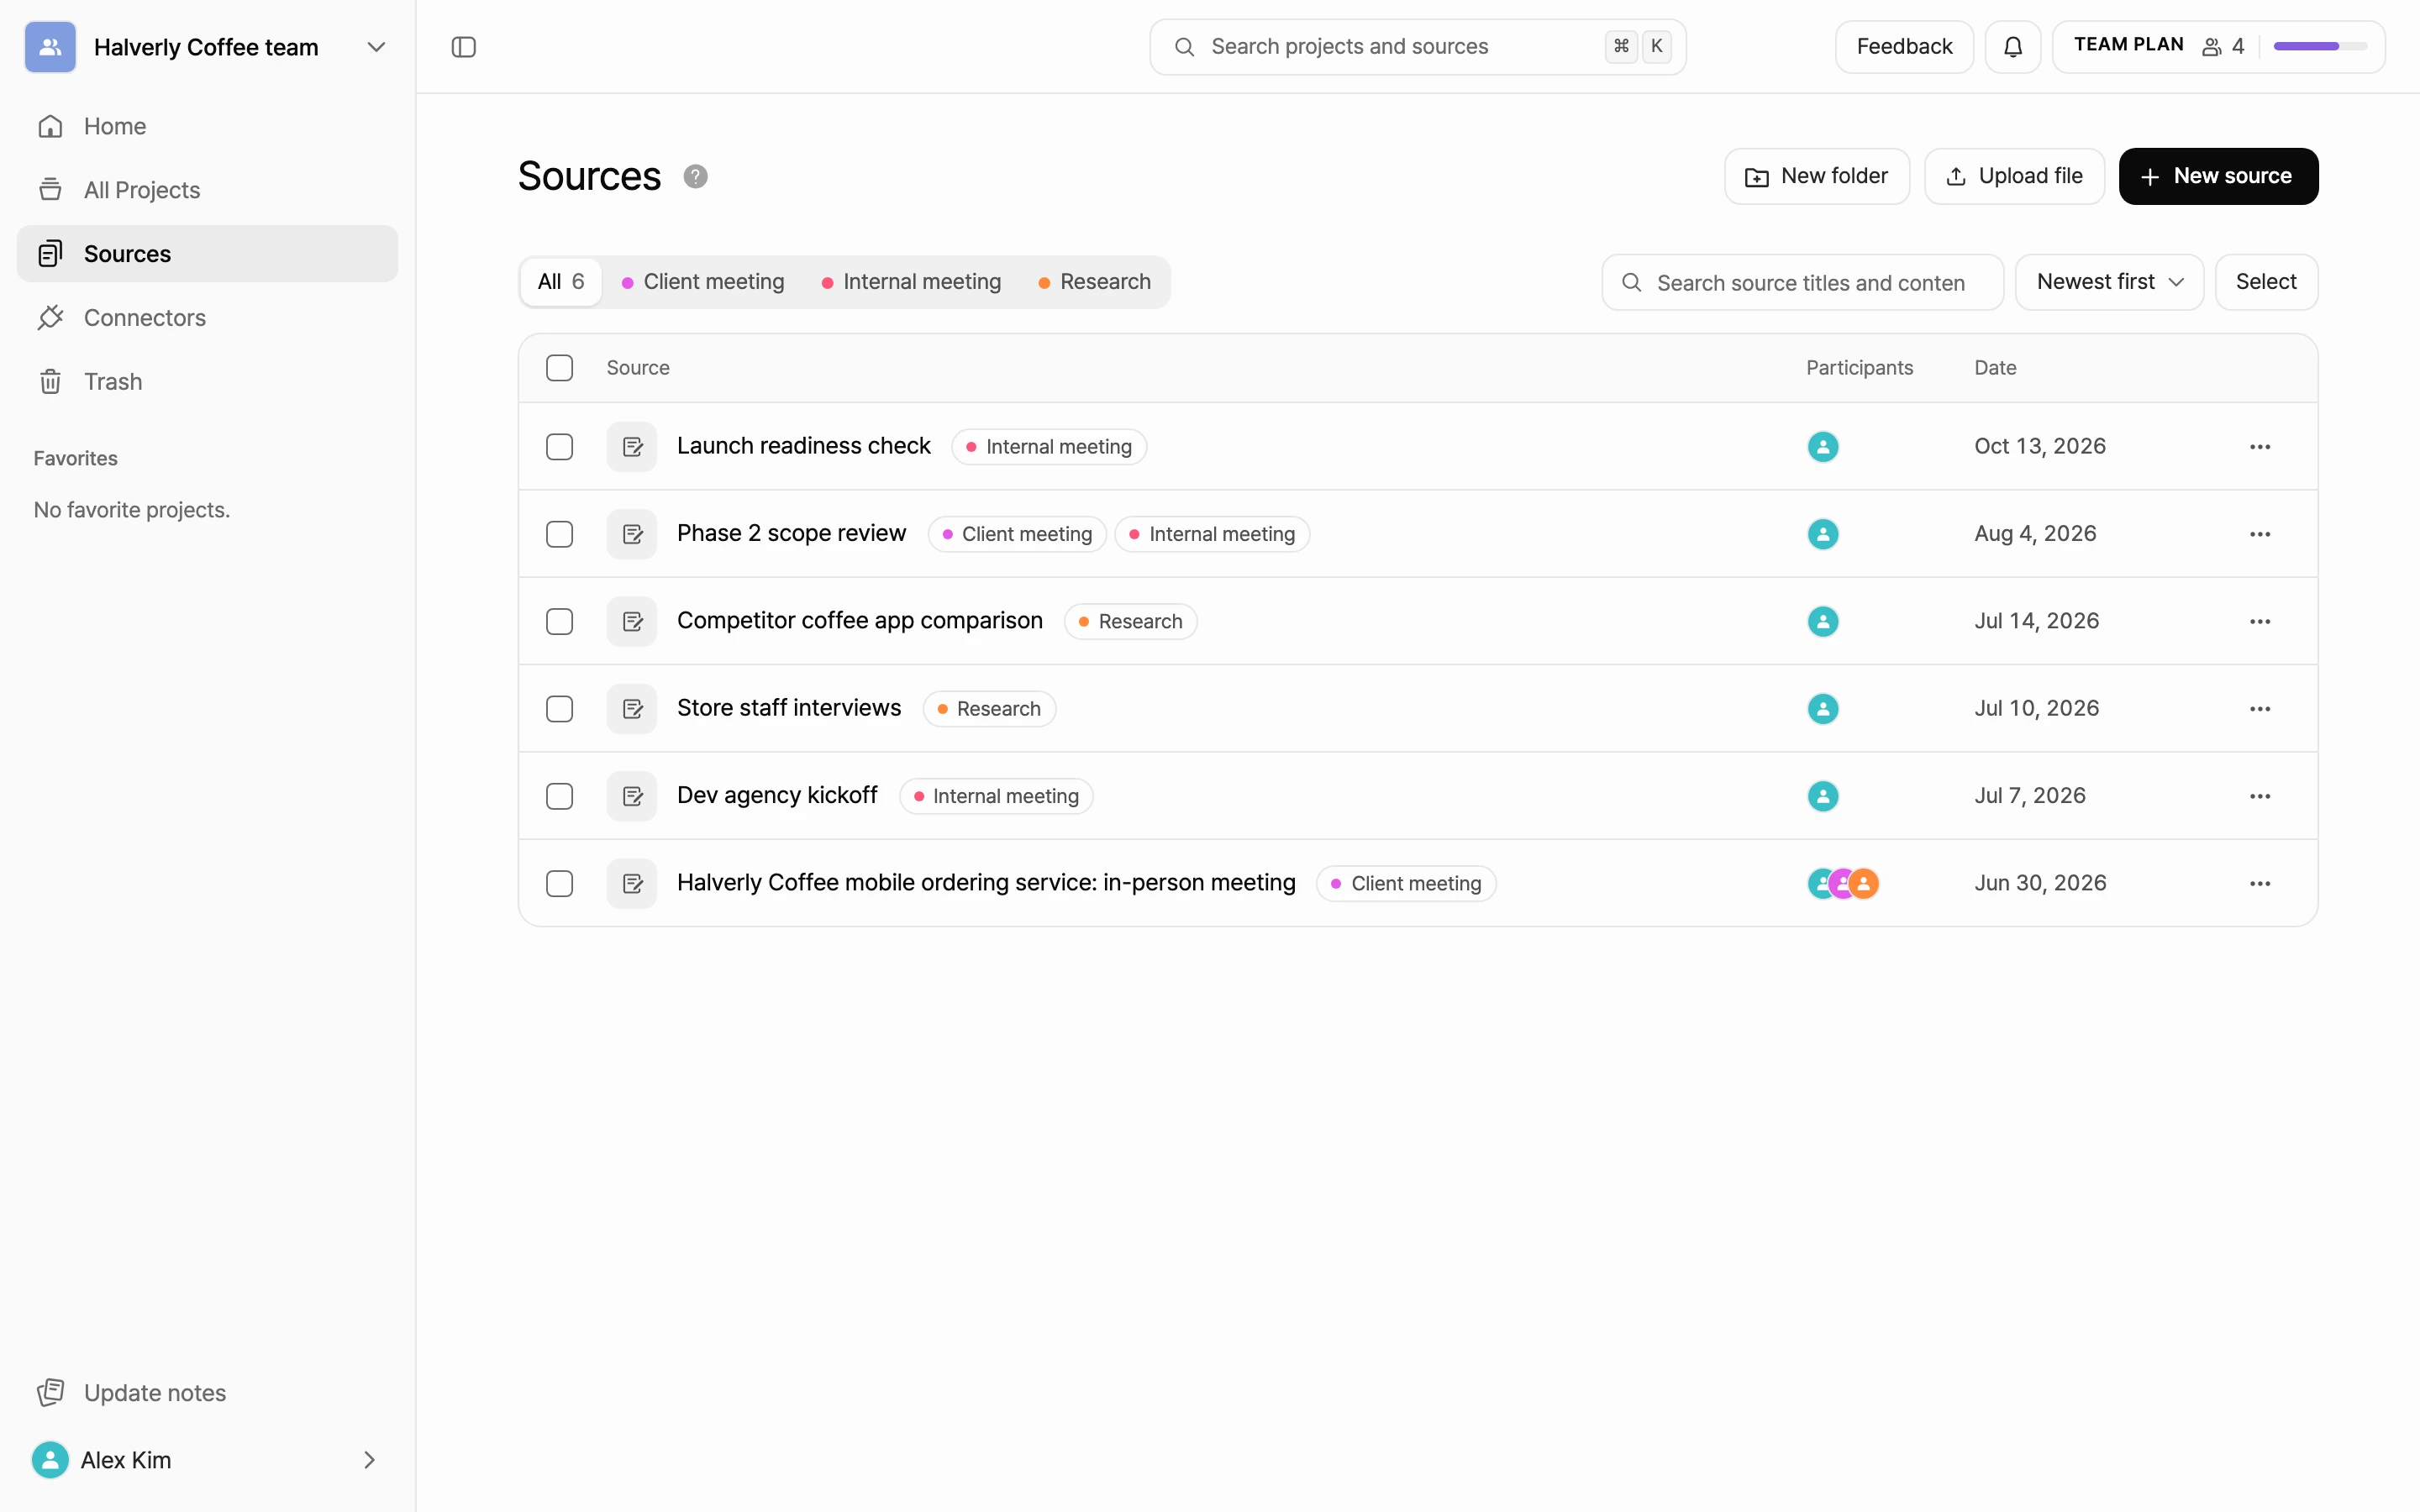
- Filter by category: select a category name above the list to see only sources with that category. Select All to see everything again. This filter appears only when your group has categories.
- Search: type in Search source titles and content to search sources in every folder, no matter which folder you're in. Results show each source's folder in a Location column.
- Sort: choose Newest first or Oldest first. Sources are sorted by their date.
Organize with folders
- Select New folder. A new folder is created inside the folder you're viewing, and you can rename it right there.
- Drag a source onto a folder, or open the source row's menu and select Move.
- To move or delete several items at once, select Select, pick the items, then select Move or Delete.
You can create folders inside folders. To rename a folder, open its row menu and select Rename.
Create a source
Start from a blank source
- Select New source at the top right of Sources.
- A new source is created in the folder you're viewing and opens right away.
- Add a title and write the body. You can paste meeting notes straight in. Your changes save automatically.
Upload a file
- Select Upload file.
- Drop in or choose one TXT, Markdown, or DOCX file, up to 10MB.
- Review the content under Body preview. Edit the Title, Date, or body if needed.
- Select Create new source.
Write a source
When you open a source, the Decisions panel appears beside the title and body (below them on narrow screens). Set the source's details under the title.
- Date: the day the source is about, such as the meeting date. It's shown in the list and used for sorting.
- Participants: select Add participants to show which group members took part.
- Categories: select Add categories to tag the source. Type a new name to create a category. Categories are shared across your whole group, up to 50 per group.
Several members can edit the body at the same time. Type @ in the body to mention a group member or a project. Members you mention get a notification.
To pull decisions out of a source and apply them to your spec, see Apply decisions to your spec.
Discuss with comments
Use comments to share your thoughts as you read a source. Viewers, who can't edit the body, can leave comments too.
- Comment on the whole source: select the comment button (Add a comment) in the header above the source to jump to the comment box below the title and above the body. If there are open comments, their count shows next to the button.
- Comment on selected text: select text in the body, select Comment, write your comment, and select the up arrow button (Send) or press Enter. The selected text is highlighted. On wide screens, the comment appears next to the body. On narrow screens, select the highlighted text to open it below.
- Replies and resolving: select Reply to keep the conversation going. When the discussion is done, select the check icon (Resolve) on the first comment. To pick it up again, select Reopen in the same place. With a mouse, hover over a comment to see these icons. Resolved comments are hidden. Select Show N resolved comments to see them again.
- Editing and deleting: only the author can edit or delete a comment. Deleting a comment that has replies deletes the replies too, and they can't be restored.
If the text a comment points to is later changed or removed, the comment shows The original text was changed or removed. The Sources list shows how many open comments each source has.
Share a source outside your group
To show a source to people outside your group, such as clients or partners, share it to the web. Anyone with the link can read that source without signing in.
- Open the source, open the ⋯ menu at the top right, above the title, and select Share to web.
- Turn on Share to web.
- Select Copy link in the window and send the link. To preview what others will see, select Open page. Don't mix it up with Copy link in the ⋯ menu, which copies the source's address that only group members can open.
A shared source shows Shared in its header. On narrow screens, only a globe icon shows. The shared page shows only the title, date, categories, and body. Participants, decisions, and comments aren't shown. People mentioned in the body appear as plain names, and the shared page isn't shown in search engines.
To stop sharing, turn off Share to web in the same window and select Stop sharing. The current link stops working, and if you share again, a new link is created.
Delete a source
- Open the source, open the ⋯ menu at the top right, above the title, and select Delete. In the editor's Docs panel, use the trash button in the panel header.
- Confirm in the Delete this source? dialog.
To delete several at once from the list, select Select, pick the items, then select Delete.
Next steps
- Apply decisions to your spec: use AI to pull decisions from a source and apply them.
- Notes: post what you collected in chat to Sources to share it with your team.
- Roles and permissions: see what each role can do in Sources.
- Upload project files: add reference files to a single project.