Plan with AI
Approve and reject AI suggestions
Review what the AI wrote in your PRD and Features item by item, then approve it, reject it, or edit it before approving.
When the AI changes your PRD or Features, it doesn't overwrite the document. It marks each change as a suggestion waiting for approval. Approve it and the change goes in. Reject it and the original stays. Chat requests create suggestions, and so do Apply to this project in project customization and Apply on a decision in Sources.
Recognize a suggestion
Items with a suggestion carry a badge.
| Badge | Meaning |
|---|---|
| New | The AI created this item. It stays in the document only if you approve it. |
| Modified | The AI changed this item. The old value is struck through and the new value is highlighted. |
| Delete | The AI suggests removing this item. It's removed only if you approve. |
Suggestions can cover requirements, features, specifications, product policies, and PRD sections. What the AI writes into a blank PRD the first time is saved right away, without a suggestion. Requests to change status or importance also arrive as suggestions. Everyone working on the project sees the same suggestions, and anyone with edit access can handle them.
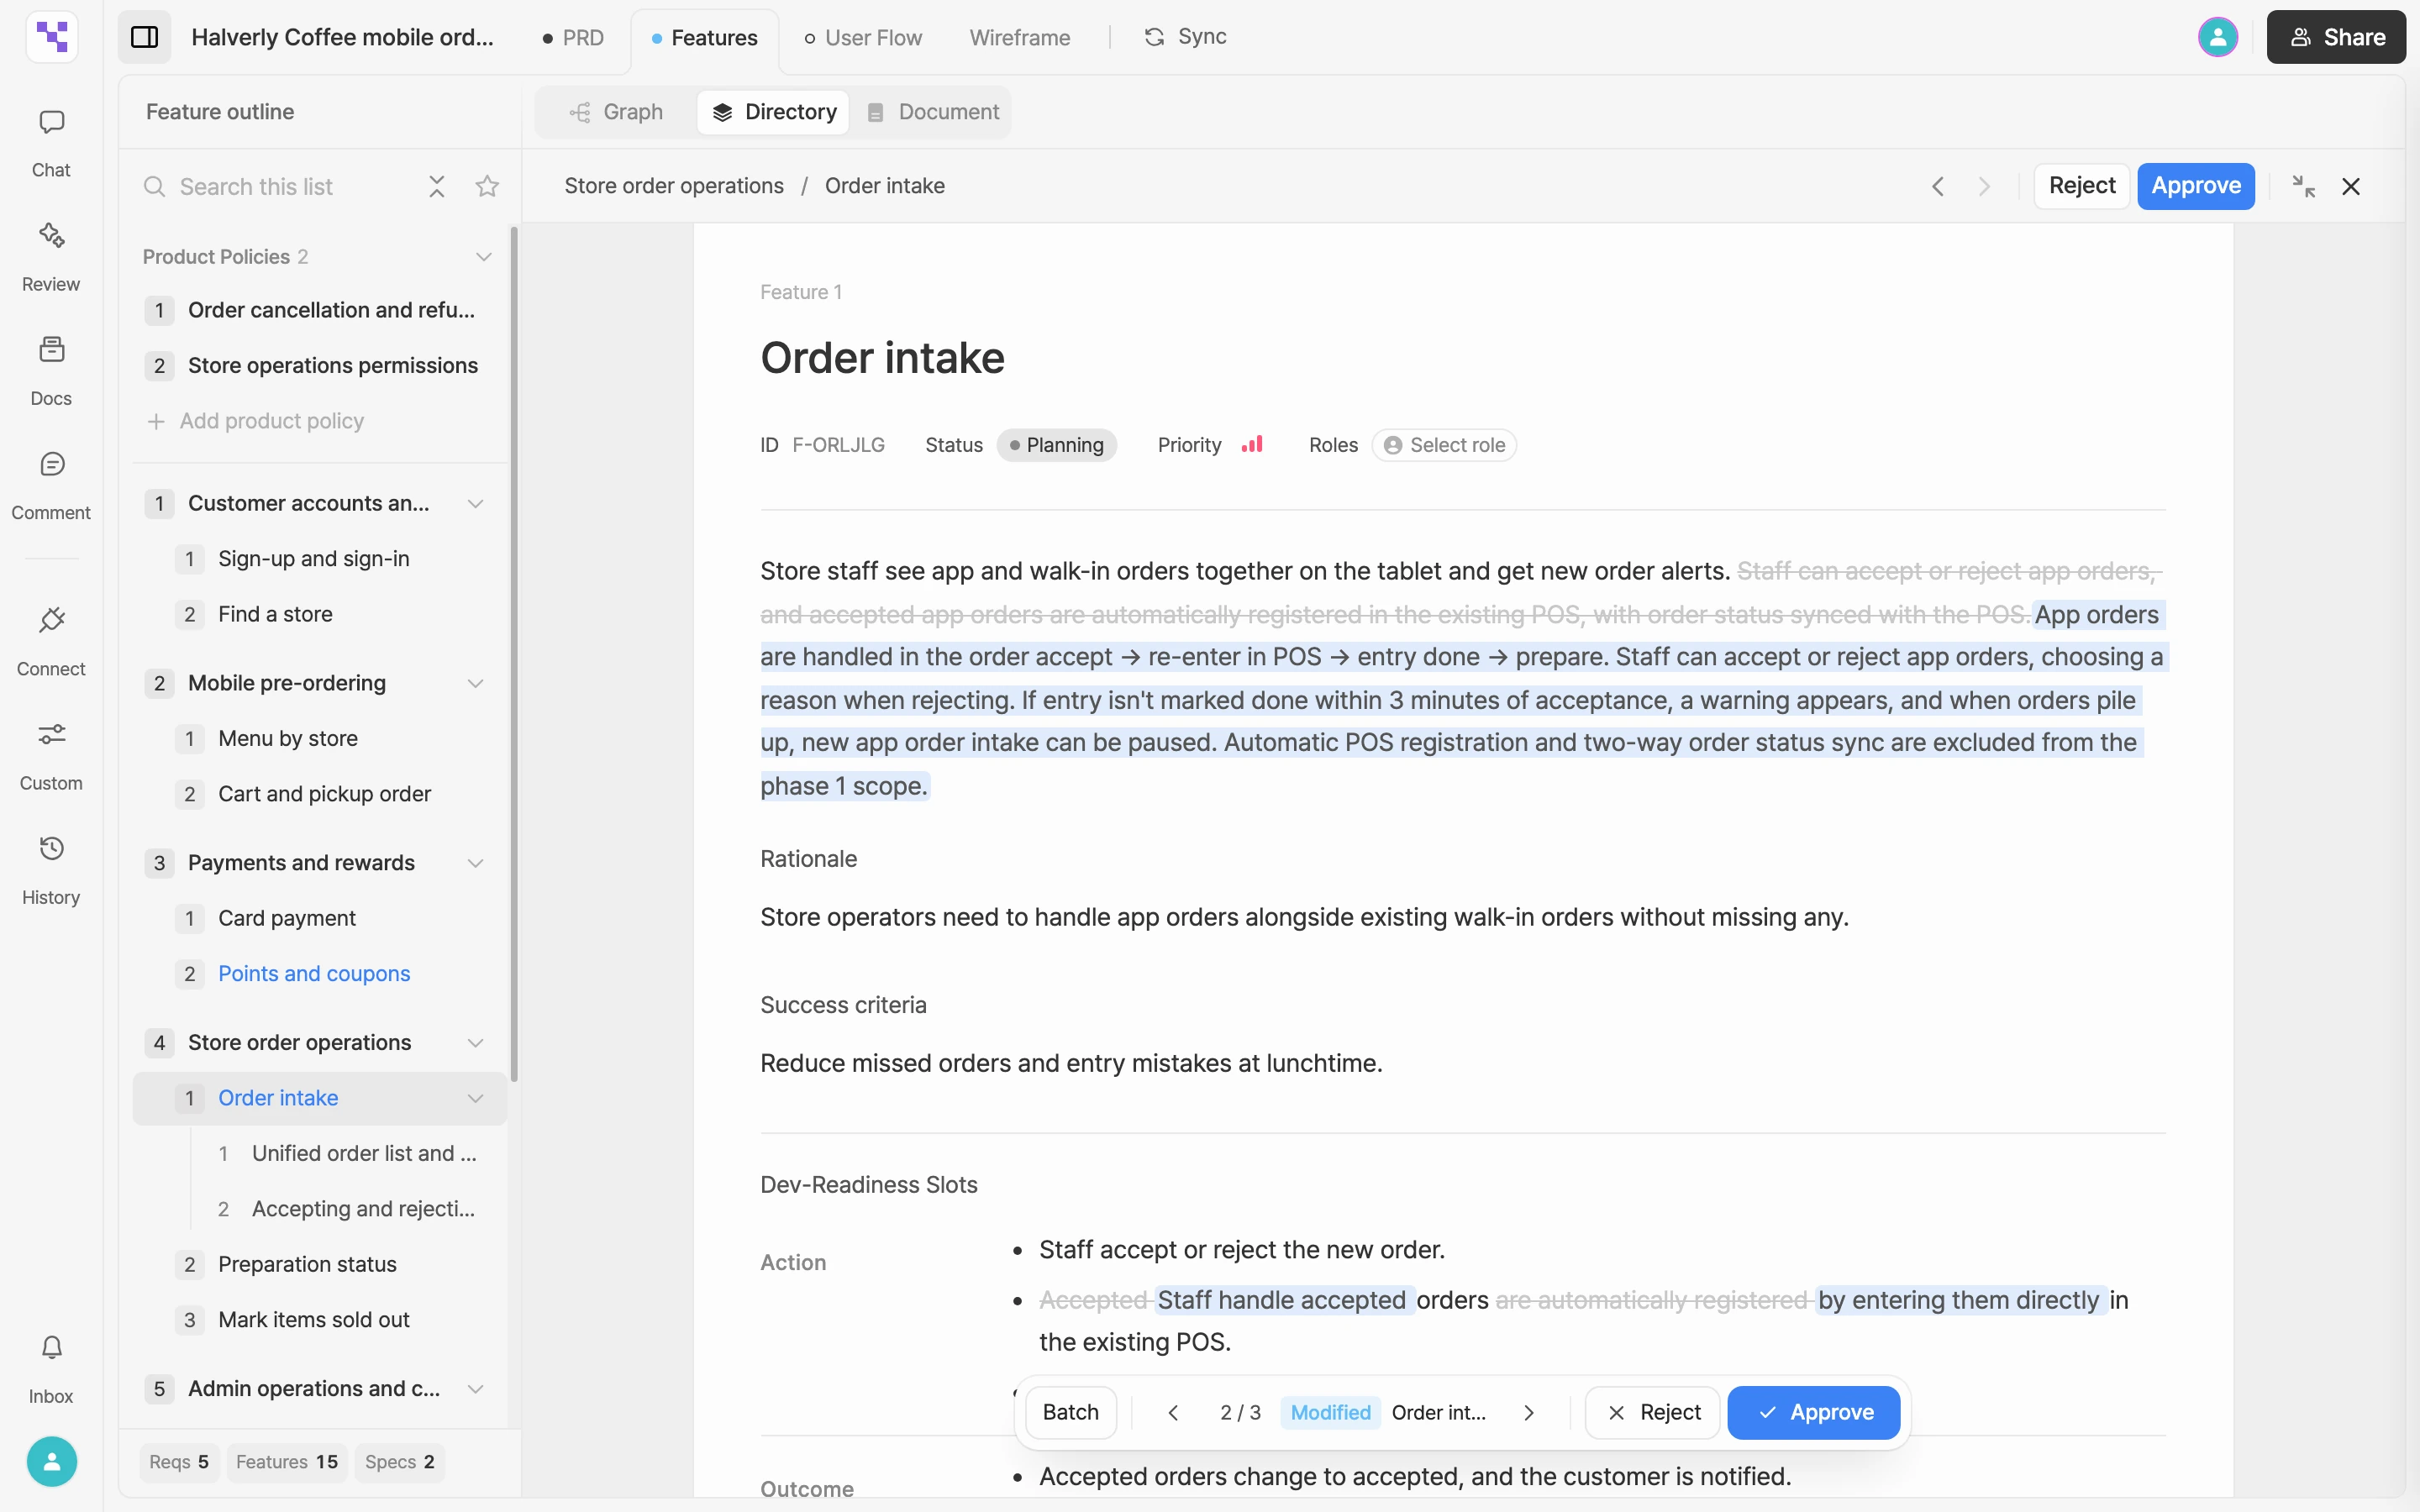
Approve one at a time
- In the Features tab, use the Graph or Directory view and select an item with a badge to open its details.
- Check what changed and select Approve or Reject. For a delete suggestion, select Confirm delete or Reject.
- Use the arrows on the review bar at the bottom to move to the previous or next suggestion. The bar shows where you are (N / M) along with the item's name and badge.
You can approve and reject right from the review bar too.
- After you approve or reject, you stay on that item and the approve button on the bar becomes Next. You can keep going approve, next, approve without moving the mouse.
- To take back an approval you just made, select Undo, which appears where Reject was.
- When no suggestion is open, the bar shows N edits awaiting approval.
- In Document view, use the Approve and Reject buttons on each block. The bar is for moving between suggestions.
- The PRD tab has the same bar for suggestions in each section.
Handle them all at once
- Select Batch on the left of the review bar.
- Select Approve All N Edits or Reject all edits.
- If you reject everything in Features, a confirmation explains what will happen. Check it and select Reject all.
- Newly proposed items are removed from the document.
- Modified items go back to their previous content.
- Delete suggestions are cancelled, so those items stay.
Select the arrow on the left of the bar to go back to one-at-a-time review.
Edit a suggestion, then approve
If a suggestion is almost right, adjust it before you approve.
- With the suggestion open, select the field you want to change, such as the name, description, or acceptance criteria. Hover over a field to see "Click to edit."
- Make your changes. Edited fields are marked Edited and show Revert.
- Select Approve and your edited version goes in.
- Your in-progress edits are visible to collaborators. Each edited field shows who changed it, such as Edited by you or "Edited by" followed by a teammate's name.
- If the AI changes the same field again while you're editing, you'll be asked which version to keep when you approve. Choose Approve with edits or See new suggestion.
- If you reject a suggestion you've edited, you'll see "Discard your edits too?" Rejecting also removes edits made by others.
- While you're editing a field of an AI suggestion, document undo (
⌘Z, WindowsCtrl+Z) doesn't apply. Use Revert on the edited field instead.
Plan confirmation card
When a change is broad and your request could be read more than one way, the AI sends a plan card in chat before writing anything. The card asks "Proceed with the following tasks?" and lists the steps.
- Read the list. To go ahead, select Proceed. Each step shows its progress, and you'll see "Done!" when it finishes.
- To stop here, select Don't proceed. The AI won't edit the document in that reply.
- To change the plan, send a message describing what you want instead.
Even after you proceed, the results come in as suggestions, so you get one more look before anything is final.
Other confirmation cards
Some changes outside your spec items also wait for your go-ahead.
- User flow generation: choose Generate now or Cancel generation on the chat card. See User flows.
- Project customization proposals: select Approve or Reject in the customization panel. See Customize your project.
- Creating, updating, or commenting on issues in an issue tracker: review the approval card in chat before it's applied. See Connect issue trackers.