Write your spec
View as graph, directory, or document
Switch Features between Graph, Directory, and Document views to see its structure, edit items, or read it as a doc.
Features shows the same content in three views. Graph is best for seeing the whole structure at a glance, Directory for editing items one at a time in detail, and Document for reading a single requirement like a document. An edit in one view shows up in the others right away.
| View | Use it to |
|---|---|
| Graph | See the structure and connections, spot missing child items, and change the status of many items at once |
| Directory | Pick an item from the list and write or edit its details |
| Document | Read one requirement and its features and specifications from top to bottom, editing as you go |
Switch views
- On the left of the band above the Features body, select Graph, Directory, or Document.
- Press
Shift+Spaceto cycle through Graph, Directory, and Document. - While you're on the Features tab, clicking the tab again cycles in the same order.
If you had an item selected, switching views takes you to that same item.
The Feature outline list
All three views use the Feature outline list in the navigator on the left. Requirements, features, and specifications are indented by level, with a Product Policies group at the top.
- Search this list: Find items by name. In the Graph and Directory views, pressing
⌘F(WindowsCtrl+F) also takes you here. - Expand button: Expand to specs opens every level, and Show requirements only collapses them again.
- Favorites: Hover over a row and select the star to add it to your favorites. Use the favorites button above the list to see them all.
- +: On a requirement row it adds a feature, and on a feature row it adds a specification. Use Add requirement at the bottom of the list to add a requirement.
- Drag to move: Drag a row to reorder it, or move it under a different requirement or feature.
- Right-click menu: Open in tree view, Open in document view, Copy link, Rename, Duplicate, and Delete. Depending on your access, some of them can't be selected.
- The bottom of the list shows how many requirements, features, and specifications you have.
Features or specifications that lost their parent collect under Disconnected items. Drag one onto the right parent to reconnect it.
Clicking an item in the list takes you to it within the current view. In Graph, it moves to that node and opens its details on the right. In Directory, it opens the details on the right. In Document, it opens that requirement's page.
Graph view
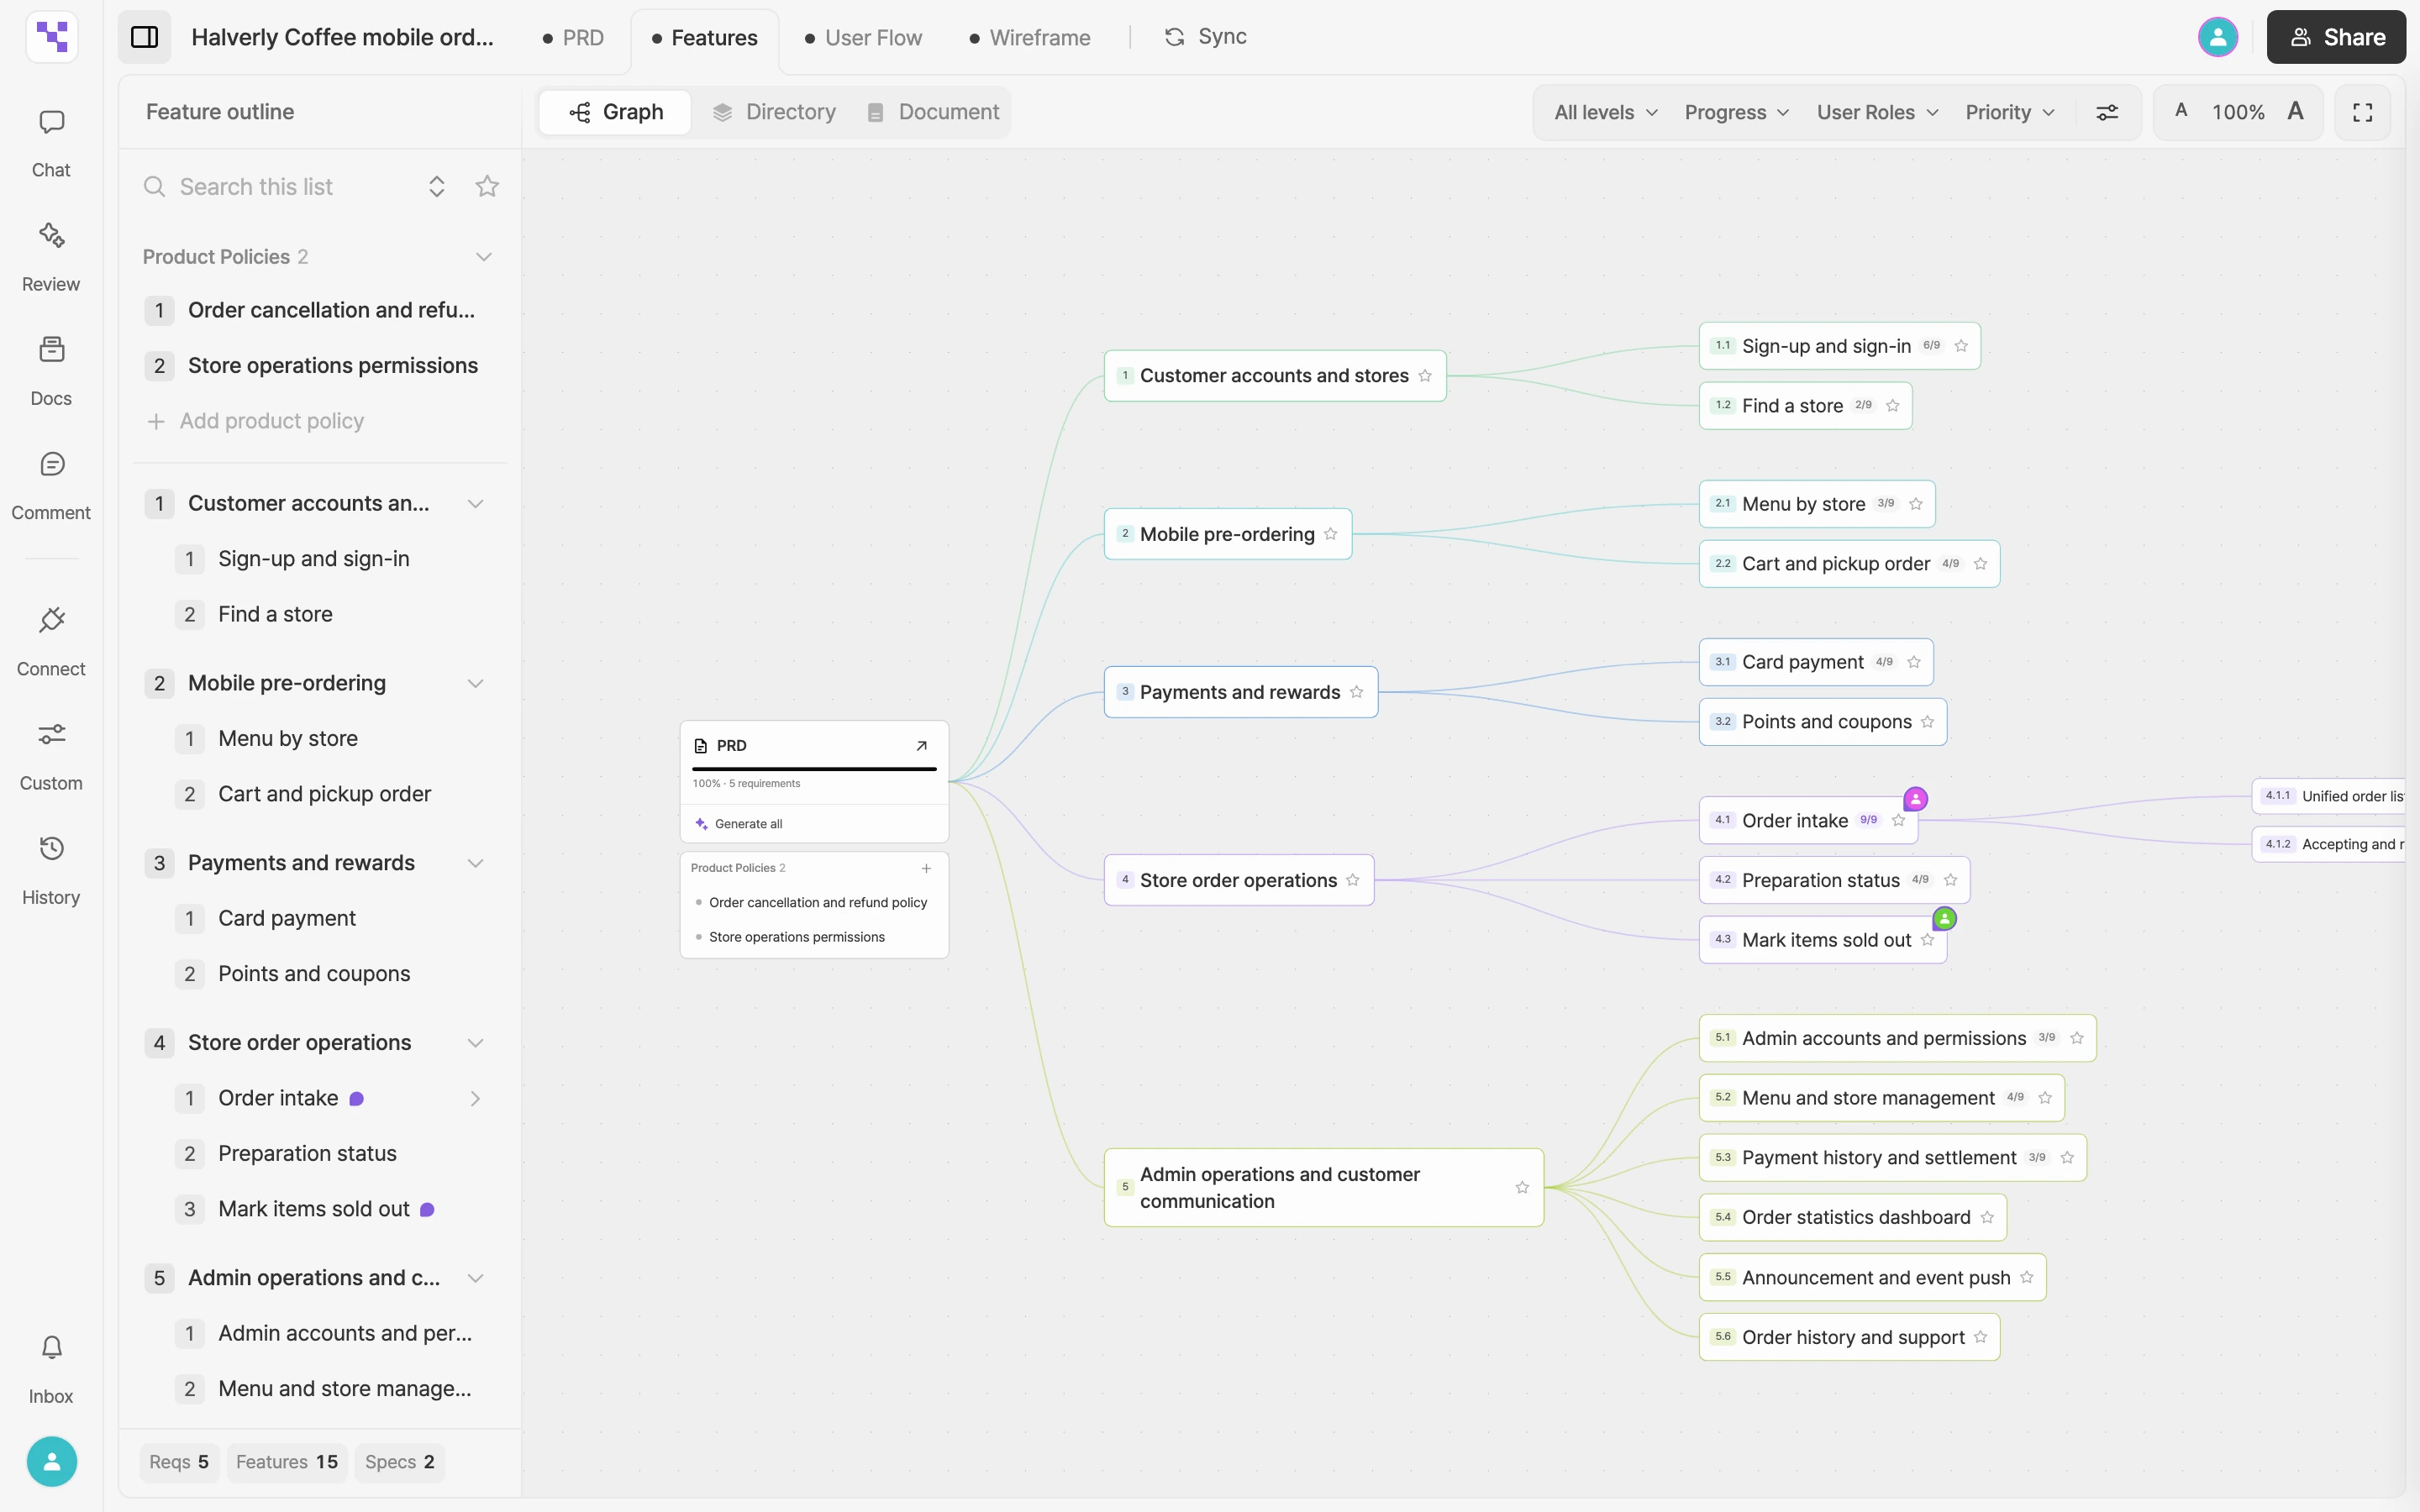
The Graph view shows requirements, features, and specifications connected by lines, branching out from the PRD card.
- Click an item to open its detail panel on the right. Select Expand in the panel to open that item in the Directory view.
- Double-click an item's name to rename it.
- When you select an item, a toolbar appears above it. You can duplicate or delete the item, and for requirements you can use Change branch color to recolor that branch.
- Drag an item to reorder it among items with the same parent.
- Scroll to move around the canvas.
Change several items at once
- Hold
Shift(or⌘,Ctrlon Windows) and click items one by one. You can also holdShiftand drag across an empty area to select everything inside the box. - Once two or more items are selected, a toolbar showing N selected appears.
- Select Status or Priority and pick a value to update every selected item at once. You can also use Delete to delete them together.
Press ⌘Z to undo a bulk change. While AI suggestions are waiting for approval, you can't select several items at once, so handle the suggestions first.
Filters and display settings
Use the tools on the right of the band above the body to show only what you need.
| Tool | What it does |
|---|---|
| Levels | Choose how deep to show: All levels, Requirements + Features, or Requirements only. |
| Progress | Show only items with the statuses you pick. You can pick more than one. |
| User Roles | Show only items for the roles you pick. Pick No role for items without a role. |
| Priority | Show only items with the priorities you pick. |
| Reset filters | Clear every filter. |
| Display settings | Under Show on nodes, turn Priority, Progress, User Roles, Favorites, and Dev readiness on or off. |
| Text size | Make node text larger or smaller, or reset it to 100%. |
| Fit to visible items | Zoom so every visible item fits on screen. |
- Parent items that don't match a filter stay faded, so you can still see the path to the items that do.
- Items without a status are filtered as Planning, and items without a priority as Medium.
- The Dev readiness option only appears in projects that use dev-readiness slots.
Directory view
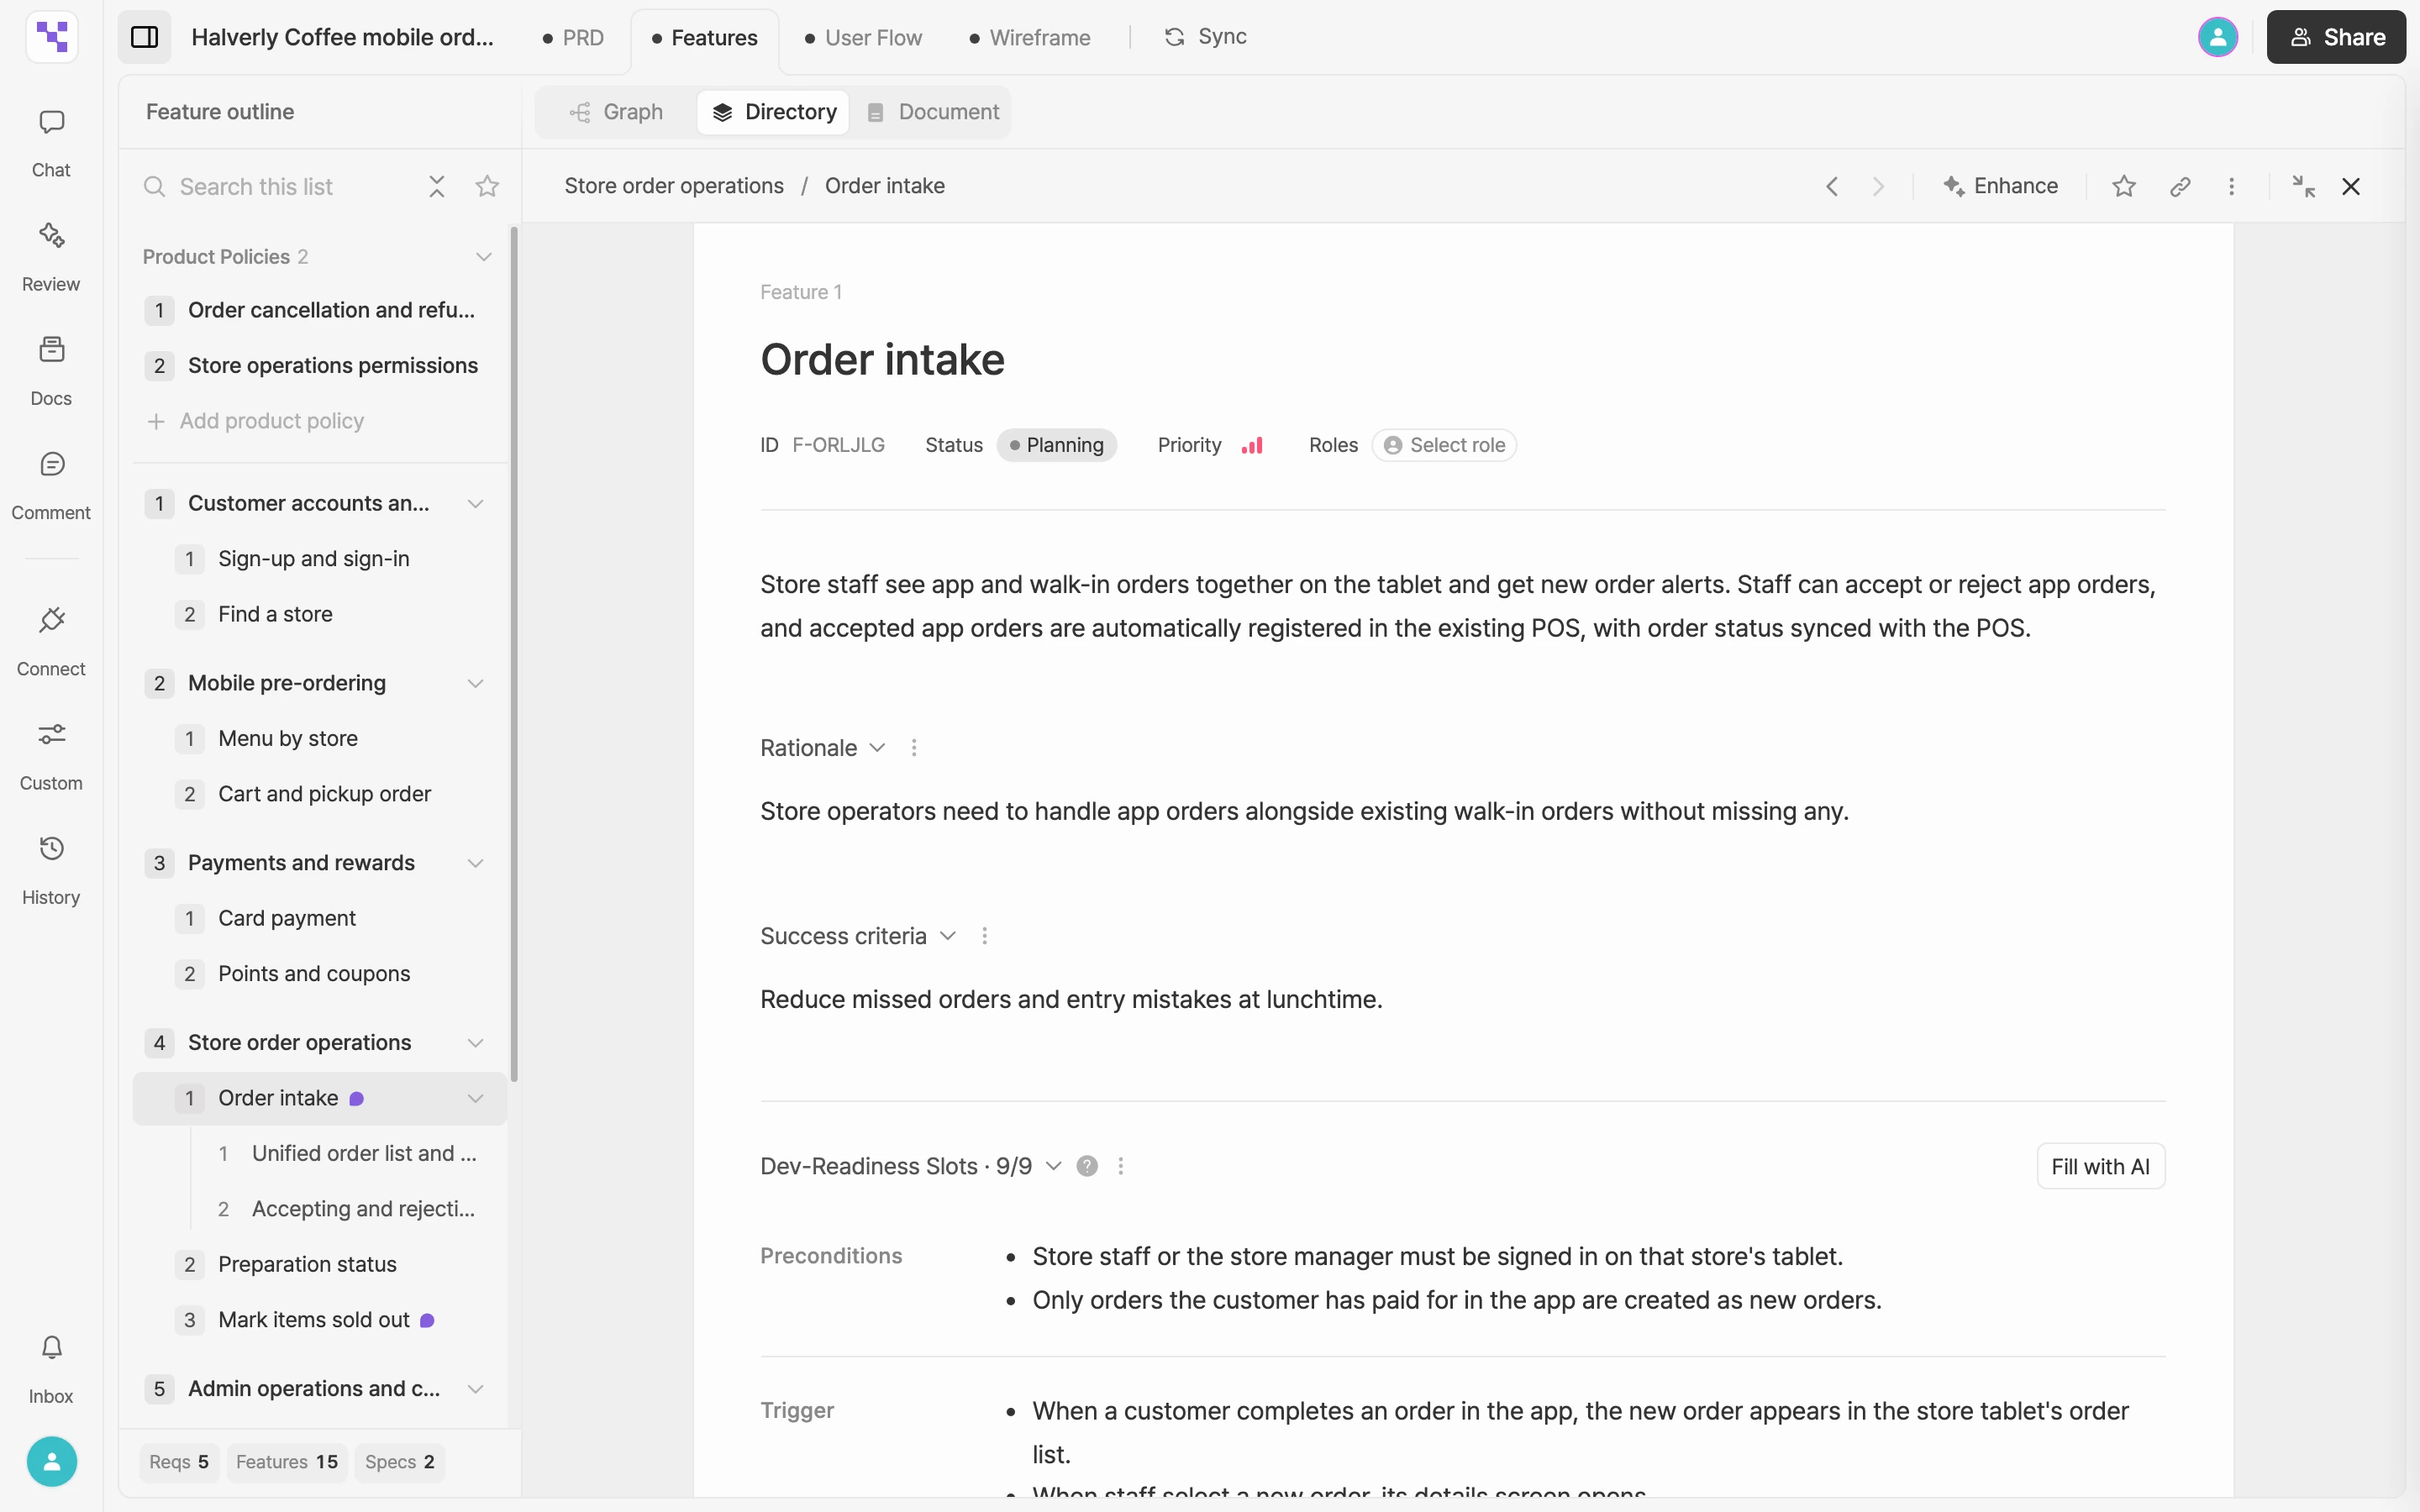
In the Directory view, you pick an item from the Feature outline on the left and write or edit it in the details on the right.
- Use Back and Forward in the band above the details to move between items you've viewed here.
- Click a parent in the path shown in the band (the requirement or feature) to go to it.
- Select Collapse to go back to the Graph view with the item's details open in the side panel.
- For more room, hide the navigator (
Shift+`).
For the fields you can fill in, see Write your Features.
Document view
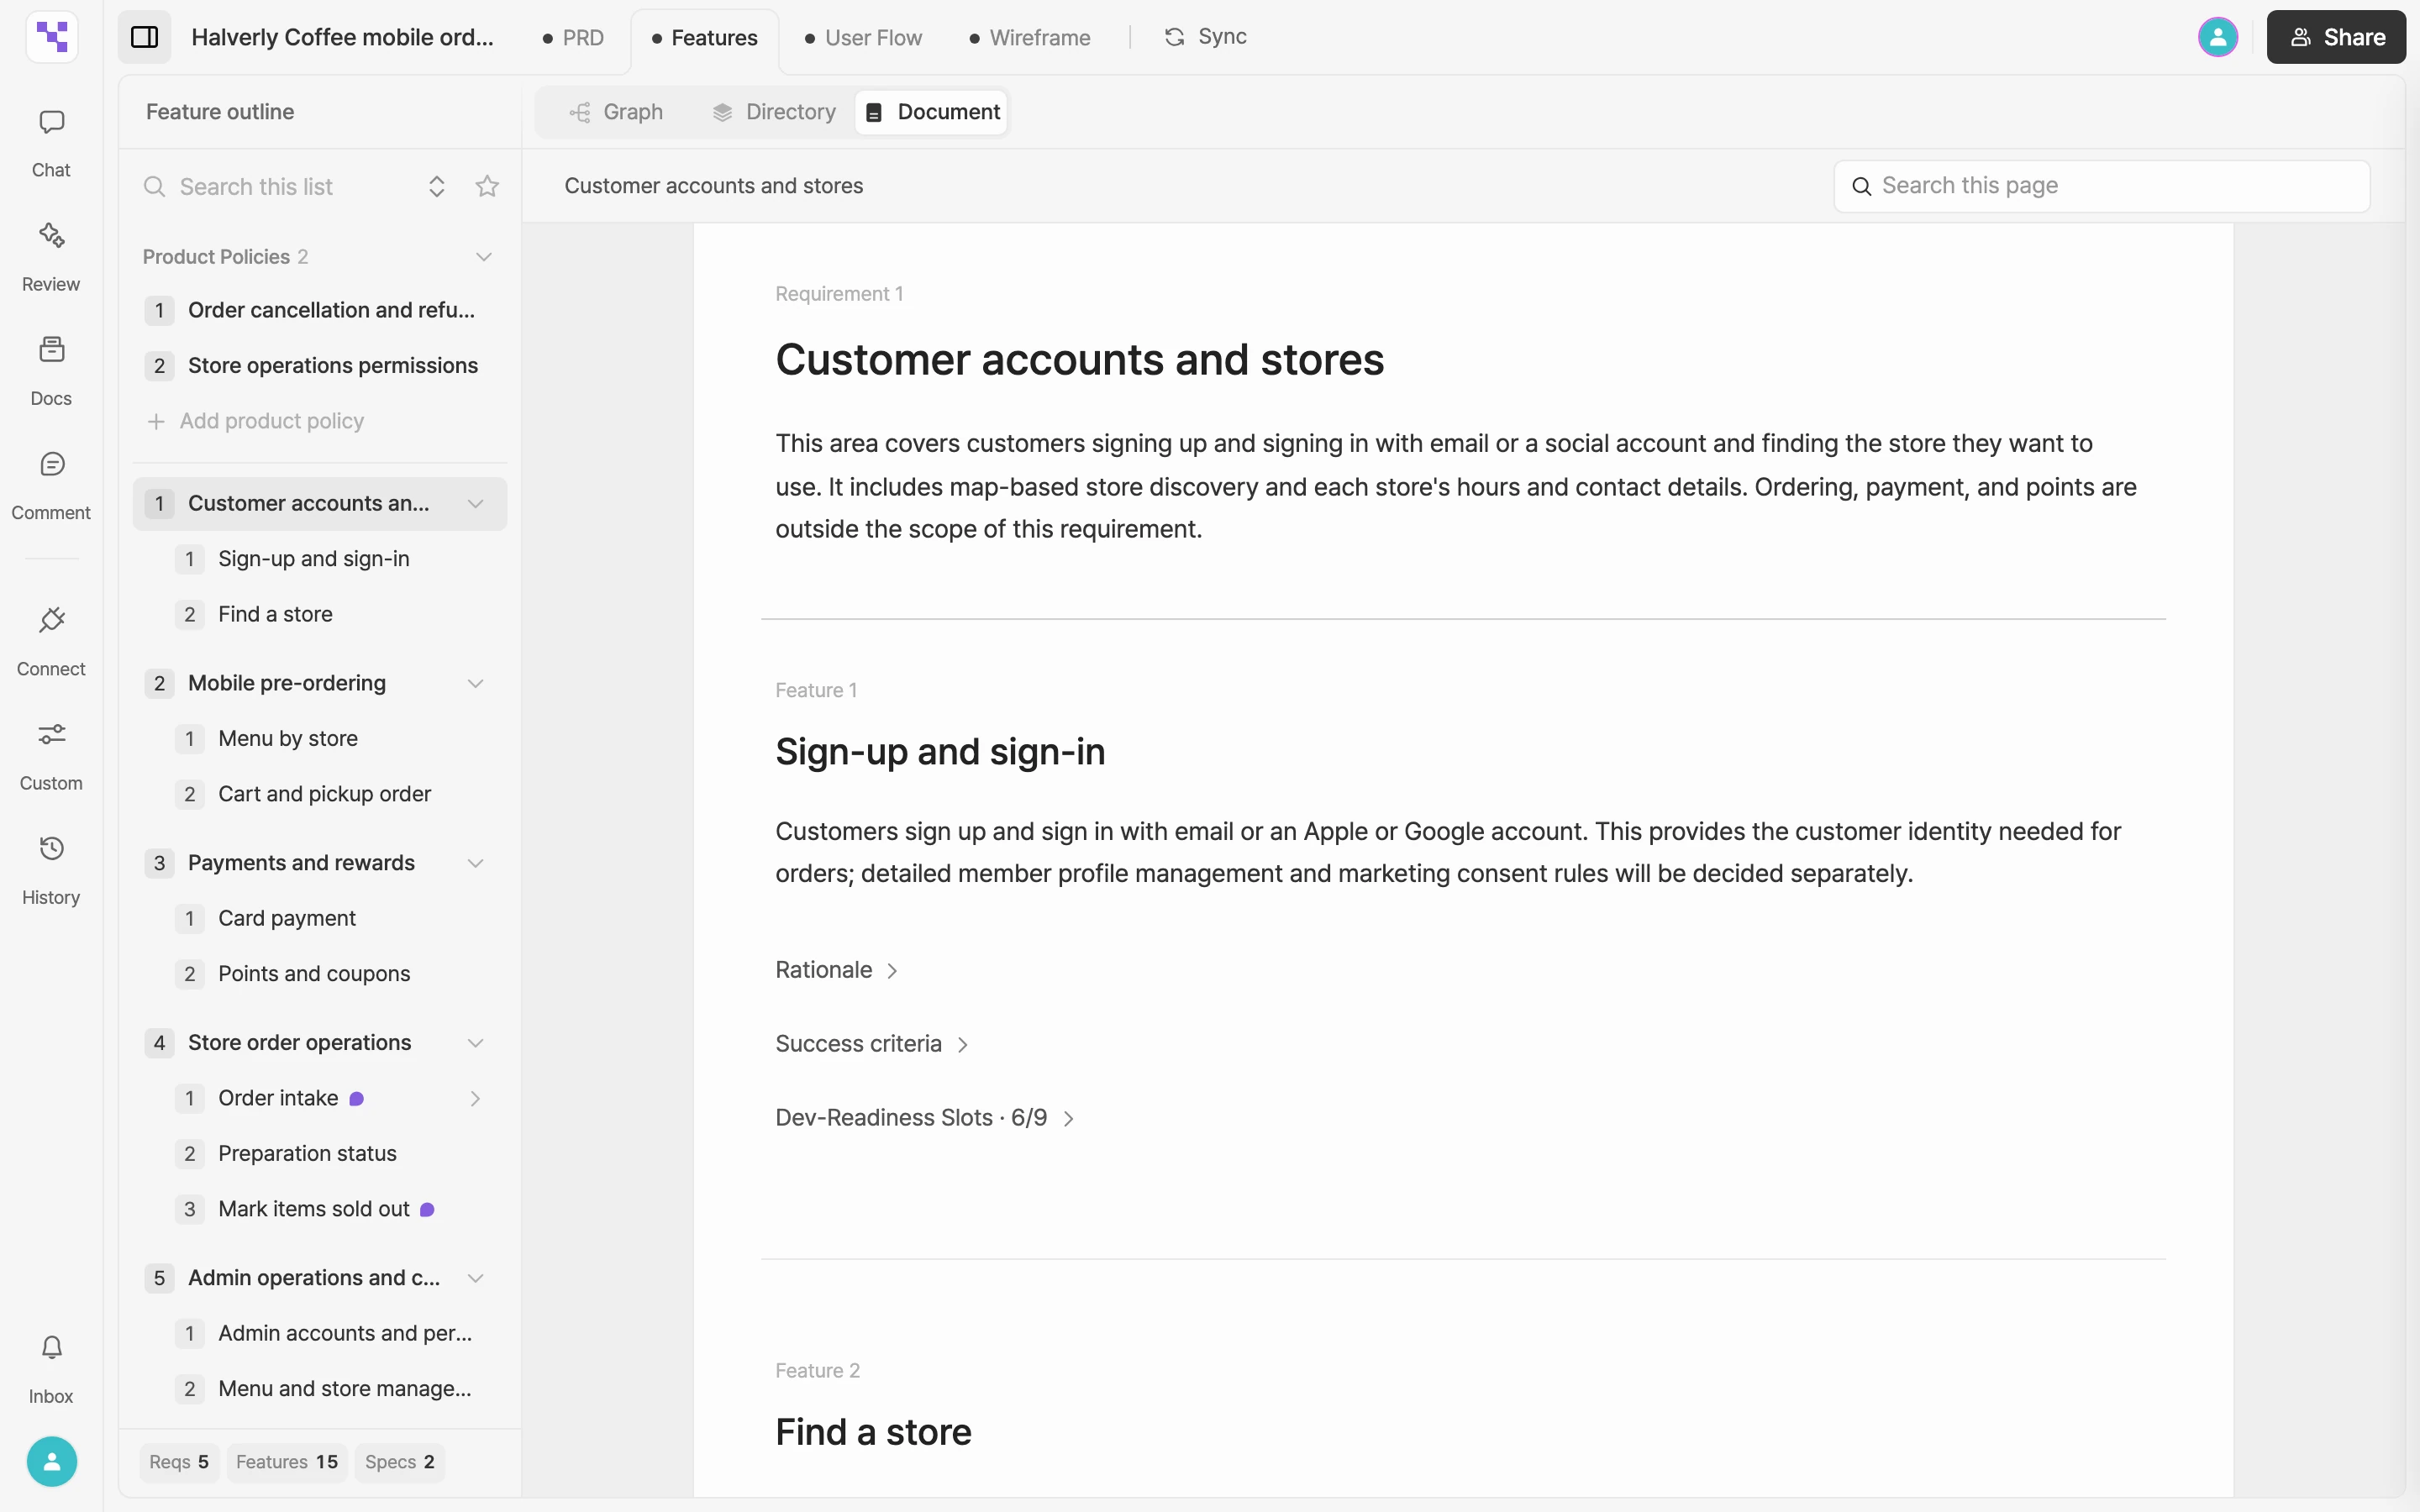
The Document view shows one requirement per page. Its features and specifications follow in order, so you can read and edit from top to bottom.
Pick and search requirements
- Click a requirement in the Feature outline on the left. Clicking a product policy opens that policy's page.
- If the navigator is hidden, click the requirement name in the band at the top and pick from the list.
- Type in Search this page in the band at the top to see where your search term appears on this page and how many matches there are (for example, 1 / 4). Use the Previous result and Next result arrows to move between them. Other requirements aren't searched.
Write right in the document
- Click a name or description to edit it in place. In a description, press
/to add blocks like tables and lists. - Rationale, Success criteria, and Dev-Readiness Slots start collapsed. Click the title to expand them before you write.
- Select Add feature below the list of features to add a feature, or Add specification under a feature to add a specification.
- Hover over a block to see its handle. Click the handle to open a menu that, depending on the block, includes Open in directory, Add specification below, Duplicate, and Delete. Drag the handle of a feature or specification to reorder it.
- You can use the keyboard too. Move between blocks with the up and down arrow keys, add an item with
⌘Enter, and duplicate with⌘D.
If there are no requirements yet, you'll see a Create first requirement button.
If you only have view access
Without edit access to the project, all three views are read-only. The add, edit, and drag tools don't appear, but you can still switch views, search, and filter. See Roles and permissions for how access levels differ.